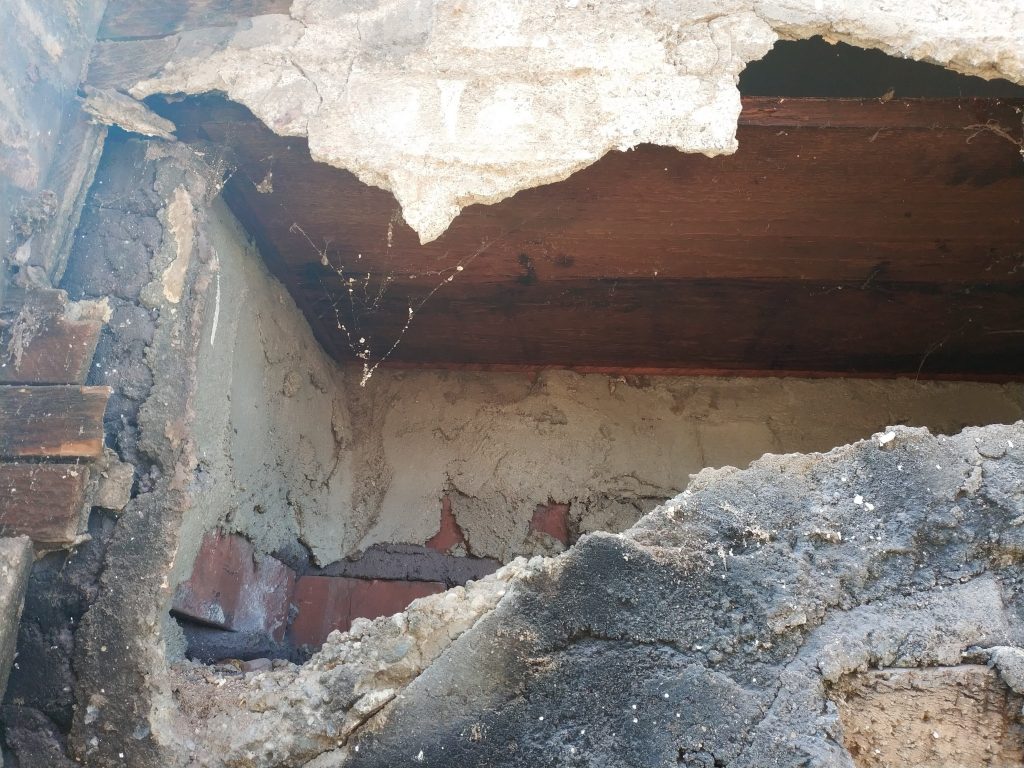
As I mentioned in past posts, the chimney on the hoard is not in the greatest of shape. Once we cleared out the master bedroom closet, we found that to be even more the case.
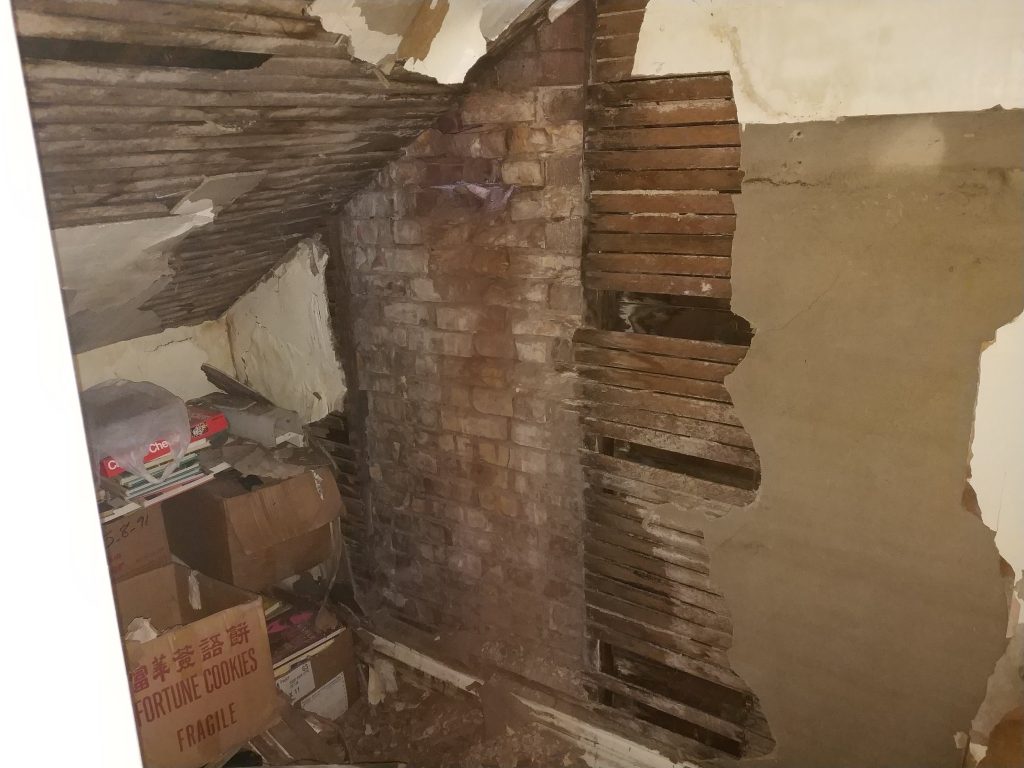
Our mason was all lined up to take care of the lean to the upper part of the chimney. He just needed us to clear a space inside the closet so he could access the bricks there for rebuild.
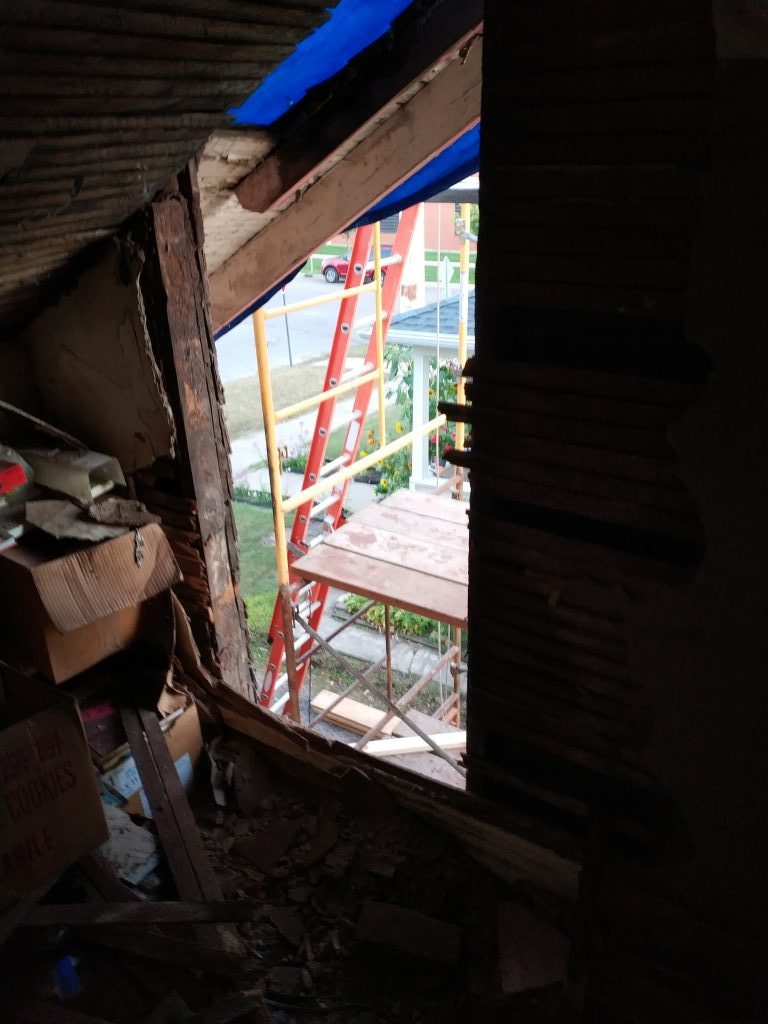
As I was doing so, however, I noticed a bit more light entering the closet than I had really wanted.
Knowing that this would soon be remedied, I happily left the project in his capable hands. But then I got a call the next day an hour or two after he arrived.
The brick was coming down very nicely. So nicely, in fact, that he didn’t need to use any tools at all. There was no mortar between any of the bricks anymore. He had just been un-stacking bricks basically.
What was holding up the chimney this long? Hopes and dreams are my first bet.
Unstacking
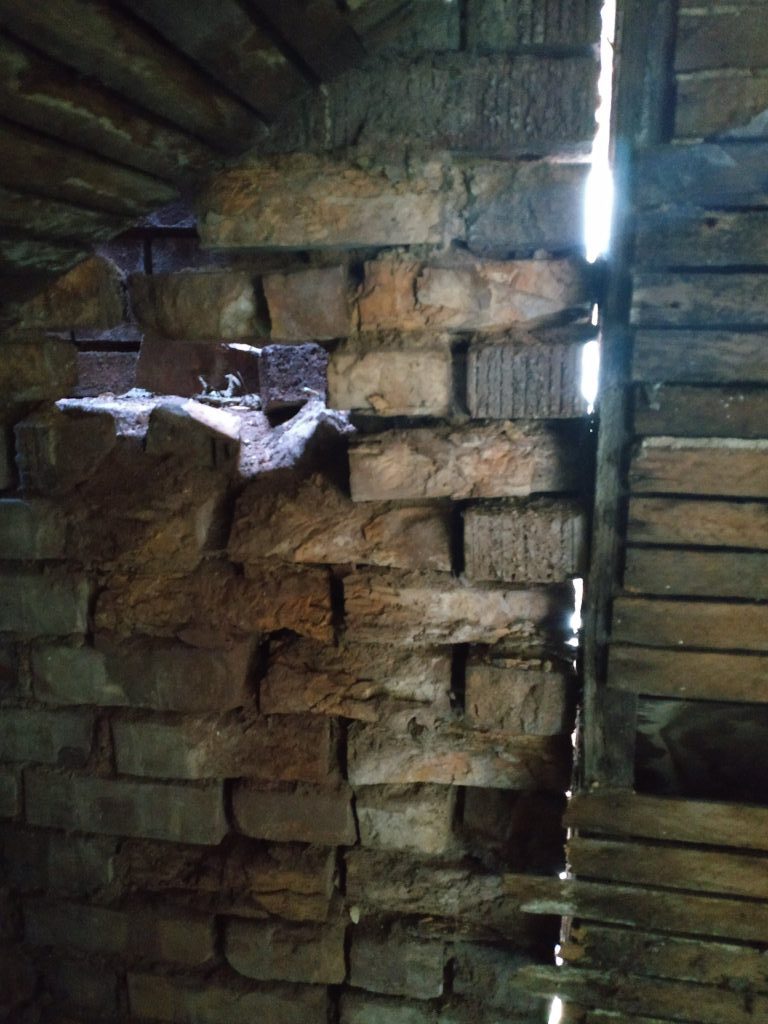
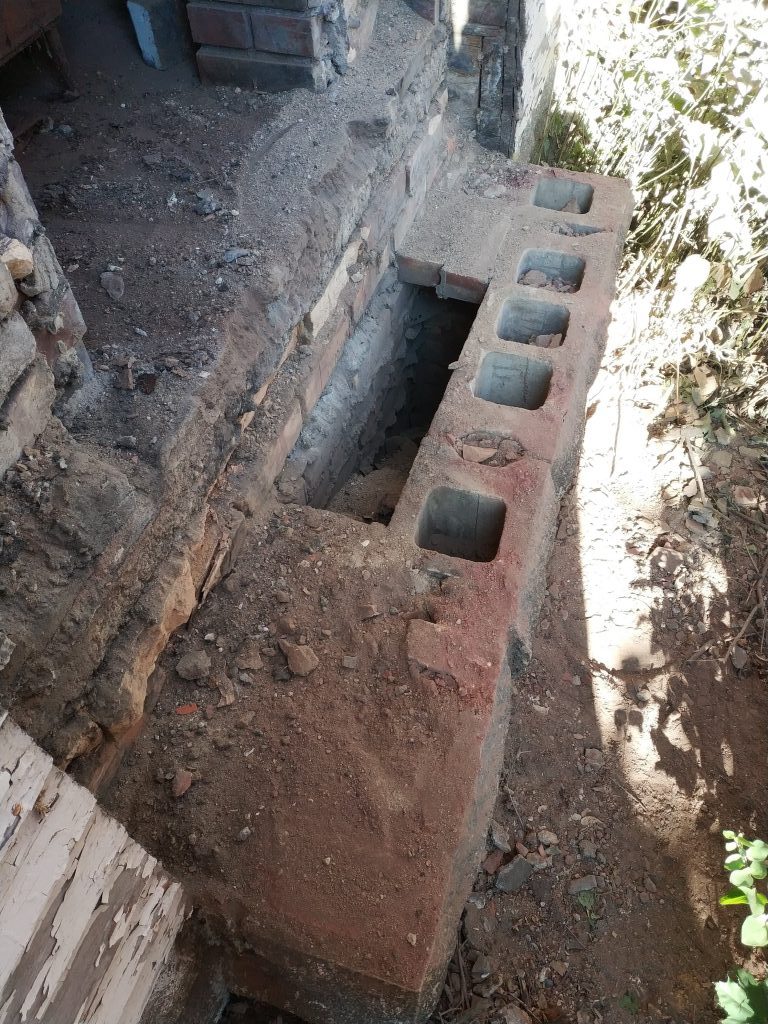
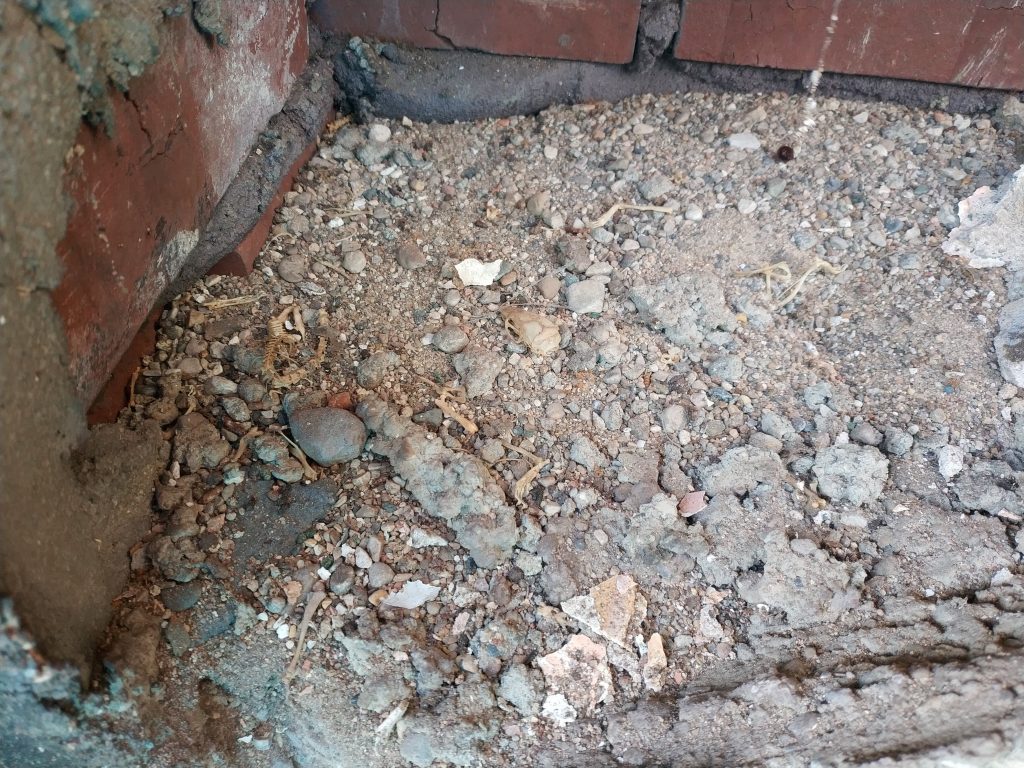
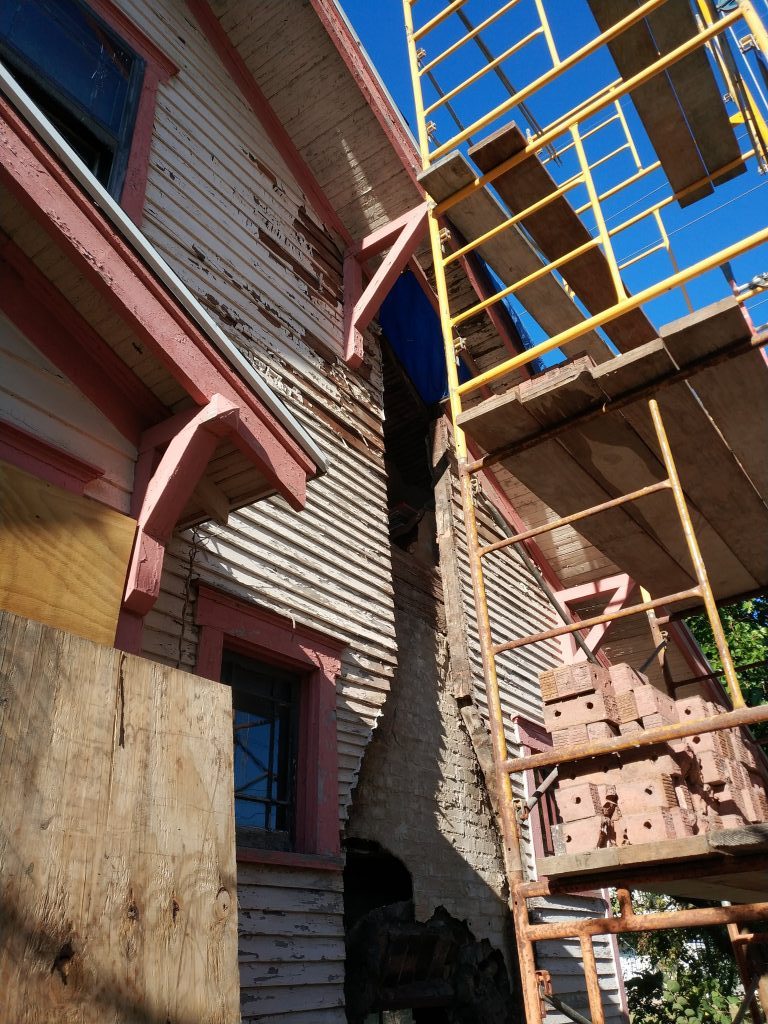
Since the lower portion of the chimney could not be saved, what with it not being solid in the least, he continued to unstack the remainder of the chimney to its foundation. And we are left with a chimney-shaped hole in the side of the house.
I keep telling myself this is advantageous, despite the obvious issues.
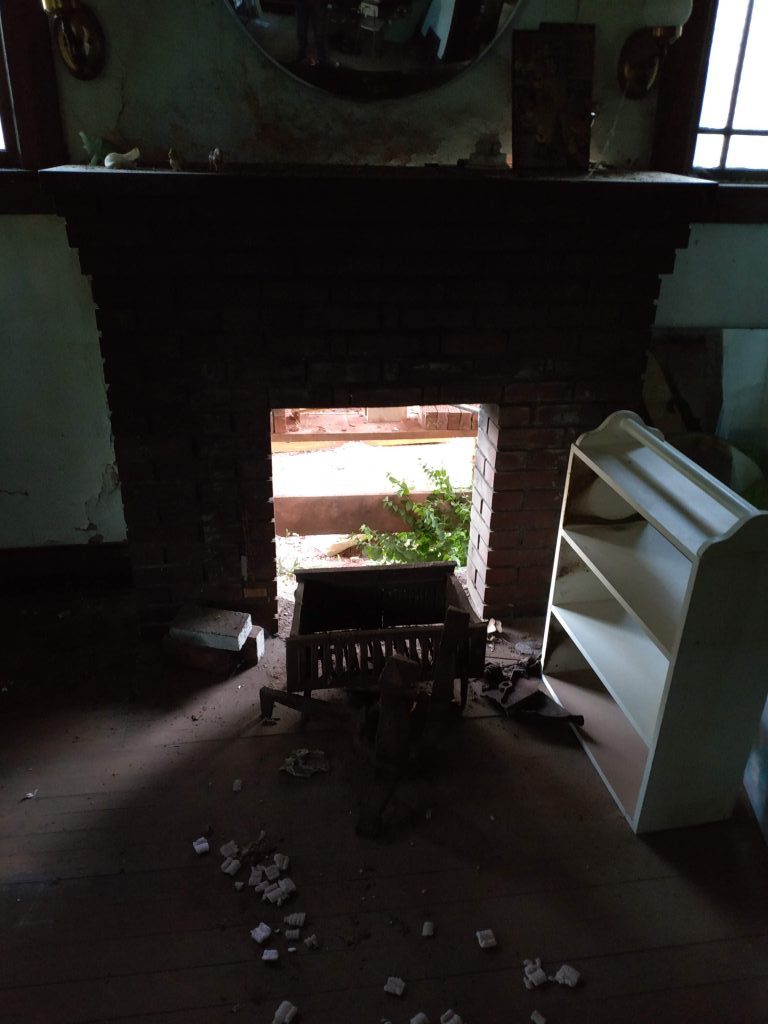
- The plaster on the chimney wall in the living room was detaching from the brick and needed to be redone anyway.
- Same with the 2nd floor closet.
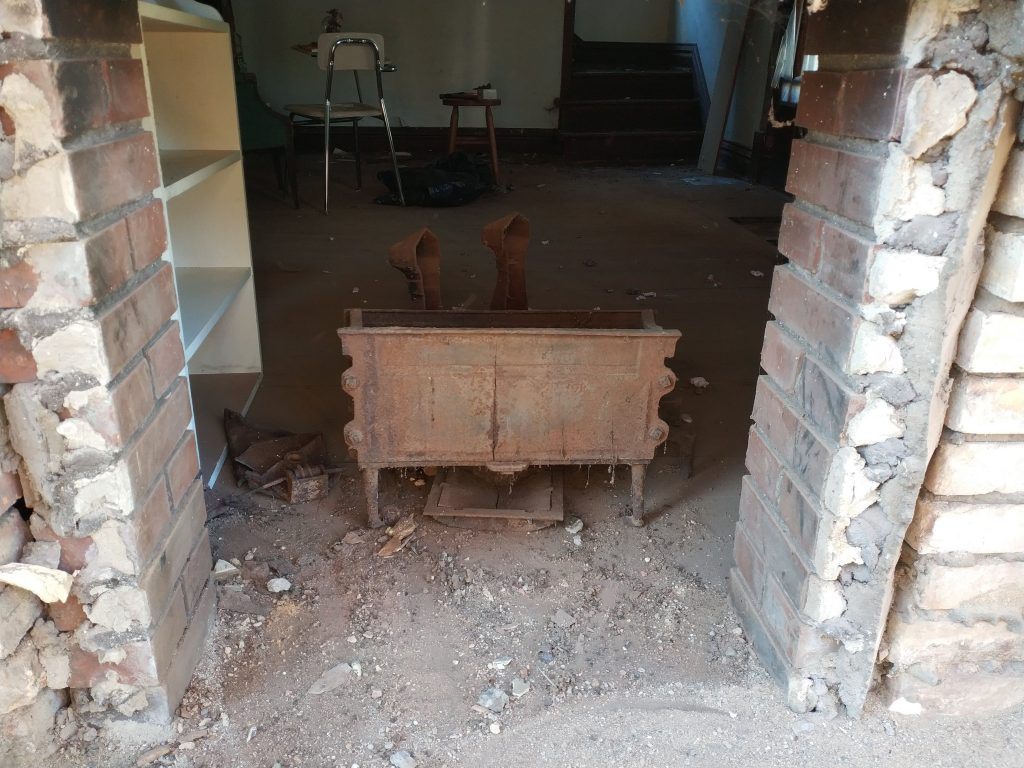
- The firebox was all rusted out and this is a good opportunity to remove it.
- There is no more fear of the chimney collapsing on the neighbor’s house.
- I get a lot more interesting posts!
There is also the technical feasibility of keeping a chimney. We never intended to use the fireplace for wood burning, and none of our new HVAC vents through the chimney, so there is really no need to have a full chimney on the house.
Dealing with the opening
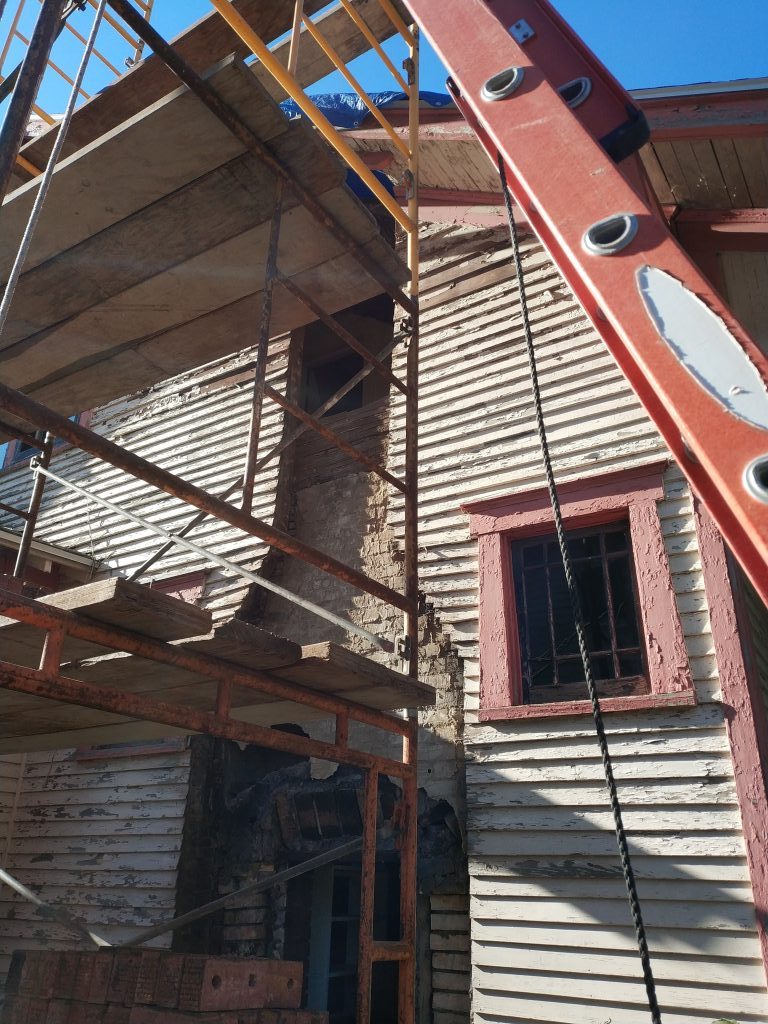
So what do we do about this hole?
There are really three options. First, we can wall over the hole with wood siding. This isn’t really the ideal path, because the hole is chimney shaped, and the patch won’t look nearly as nice as doing full siding. Further, there are two tiny windows on either side of the fireplace. These will be out of place and unbalanced if this were a plain wood wall.
Plus, there will be this big sticky-outy bit at the bottom of the wood wall with no apparent purpose:
The second option, which I also don’t really like a lot, is to build a new chimney from the ground up. Why not? It’s e x p e n s i v e. Somewhere in the realm of $7-10k. And as outlined above, we will never use it. This would simply be a show piece.
The third option, which came to me suddenly in a vision, was to just put brick veneer over the hole.
Veneer?
Brick walls are sized in wythes (why-th) of thickness, with one brick being one wythe. A structural brick foundation would have three wythes, so three ‘brick walls’ in front of each other and keyed together with bricks laid front to back, to keep them together. A brick wall above ground for structural support might have two wythes, or one wythe attached to wood studs for shared support. A brick wall one wythe thick which serves no structural purpose is referred to as a ‘veneer’.
A veneer is a LOT cheaper than a three dimensional chimney, less than a third as much. And to the casual passersby, it looks identical.
The only point where this plan breaks down is above the roof. A single layer of bricks will not stand up well when it’s flapping in the breeze. So, the decision was made to go with a brick veneer to cover the hole, and terminate at the roof line.
But, this means I have some work to do.
Backing up the veneer
There are no structural issues with having the hole in the house, it will stand up fine. But, in order to build the veneer, there has to be some kind of structure, some house onto which we can attach bricks.
So before the mason can come back, I have to build a wall to blend in with the existing wall.
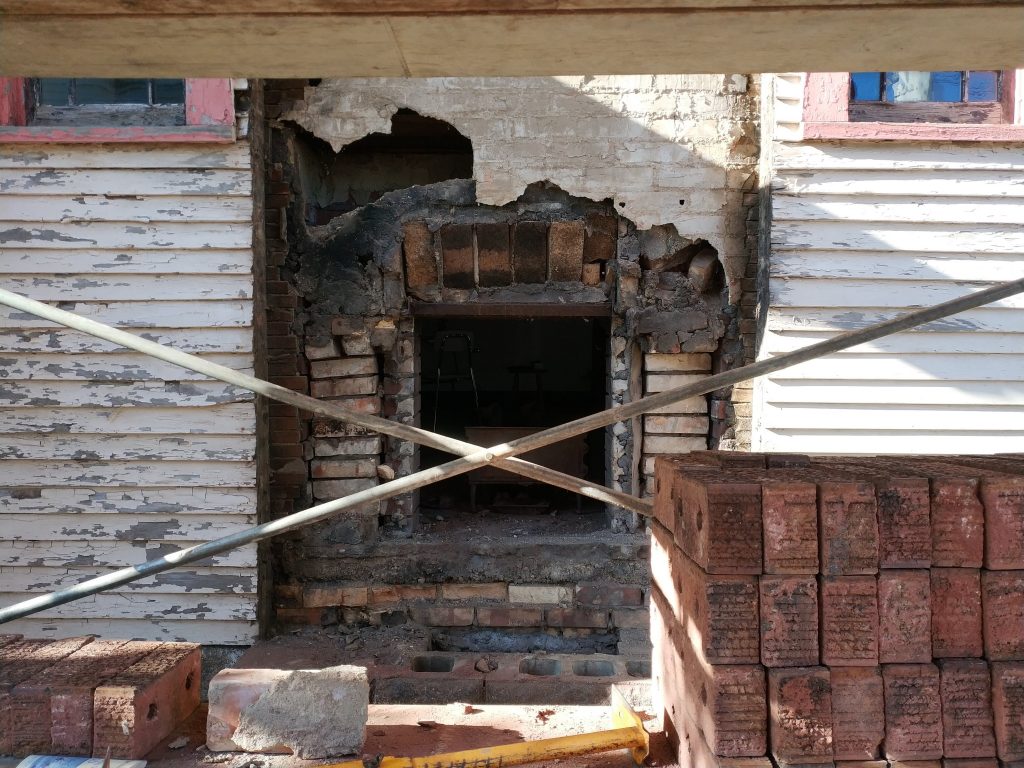
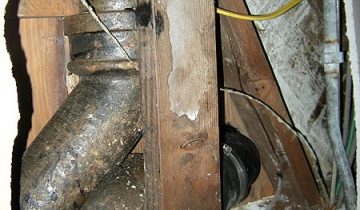
But even before I do that, I won’t have another opportunity to have a hole in the house here, so I want to take a few more pictures.
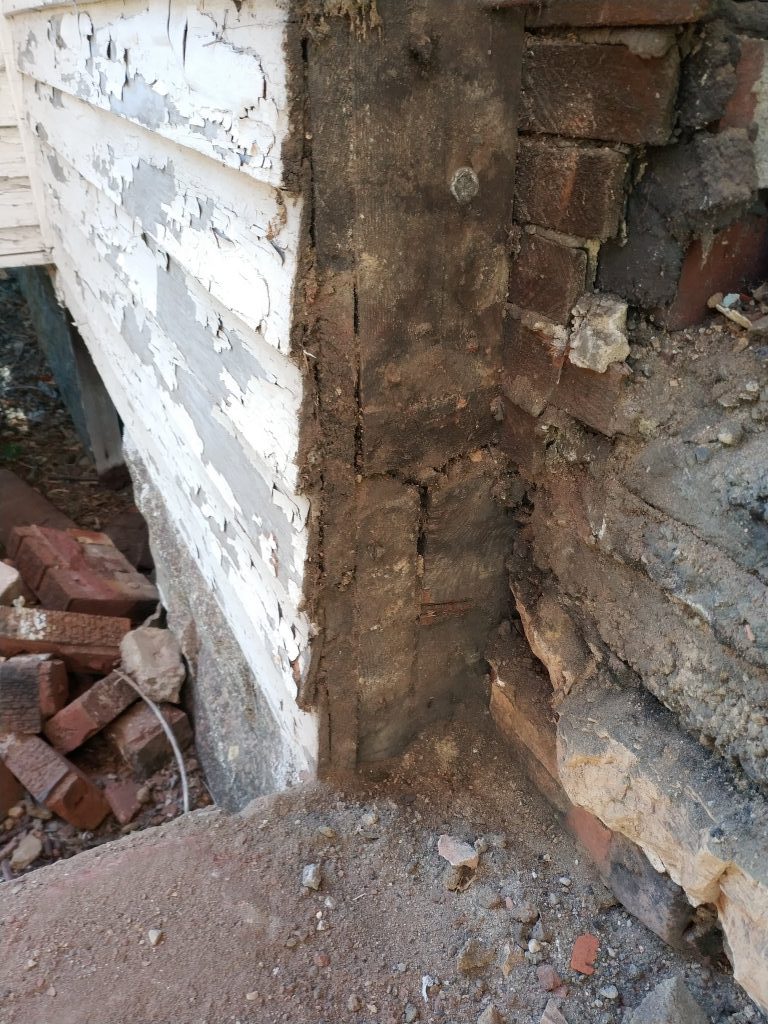
I think the previous pic warrants a bit more text than Angsty Caption AJ could provide. There are 6 main pieces of wood I’d like to point out in your typical exterior wall. Education warning!
The parts of a wall
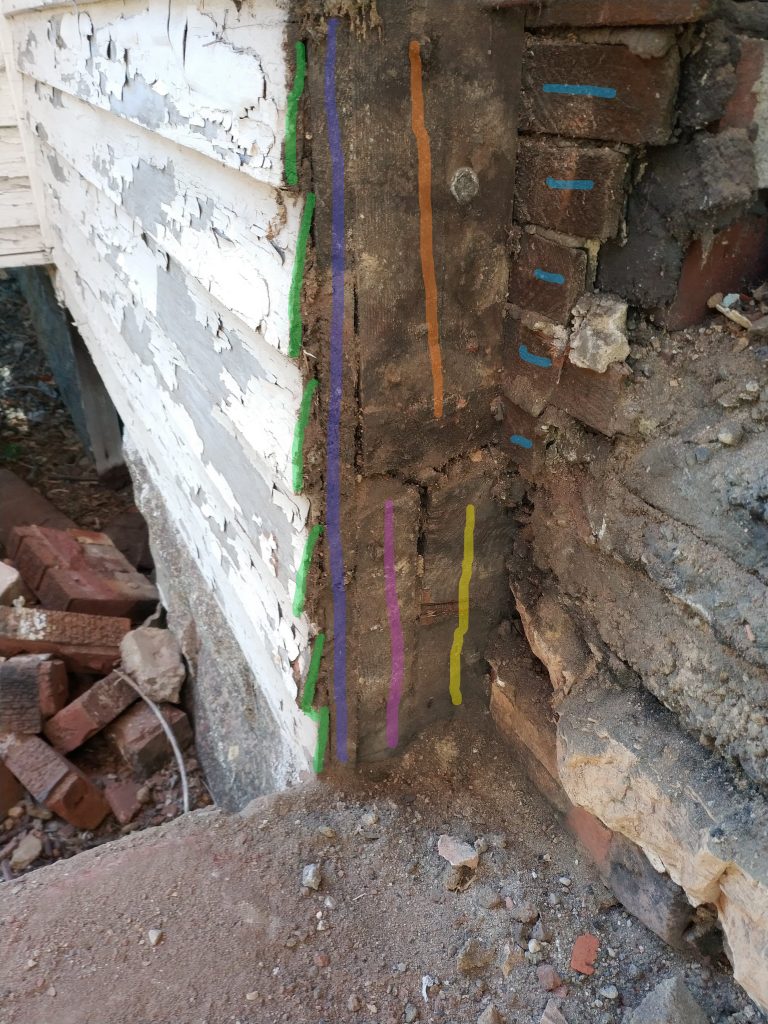
Hush, you. The fluorescent purple portion above is called the rim joist. This is a piece of lumber, around 2×10 or 2×12, which sits on edge atop of the masonry foundation, in this case, block. This goes all around the perimeter of the house, and gives a spot to which floor joists can be attached. This one goes front to back on the house. The yellow portion is a floor joist, also 2×10 or 12, which would run the entire width of the house to the other side, and support the subfloor and flooring above, so you can walk around in your house. This is also on edge for strength.
Atop the rim joist, in orange, is a wall stud. These 2×4’s (or 2×6’s) transfer the load of the roof and second floor down onto the rim joist, and thus the foundation. They also allow you to attach the exterior sheathing and siding, and the interior wall materials. Plus, since they are spaced out 16 to 24 inches, they make ‘bays’ in the wall where you can put things. Like wires or ducts, or hopefully insulation.
The dark blue portion is the sheathing of the house. This adds rigidity to the studs, so they don’t ‘rack’, or skew around side to side. It also lets you attach siding to the house. Between the siding (in green) and the sheathing, there should be a layer of waterproofing on newer houses, normally in the form of Tyvek, the same stuff they make those impossible to open envelopes out of at the post office. Older houses like this one were lucky to have a layer of paper impregnated with tar, aptly named ‘tar paper’, to keep the breeze out.
The final light blue portion is called lath, on top of which plaster would be applied. Lath is nailed right to the studs with the open bays behind, so that the plaster can squeeze through and make a ‘key’, or a bigger portion behind the lath, so the plaster can’t fall out. Plaster and lath is expensive to install nowadays, but it is much harder than other available wall materials like drywall. You can easily dent drywall with your fingernail, or Kyle can ride his BMX bike through it no problem, but you can’t as easily do the same to plaster.
Cool. More pictures please?
Happy to oblige.
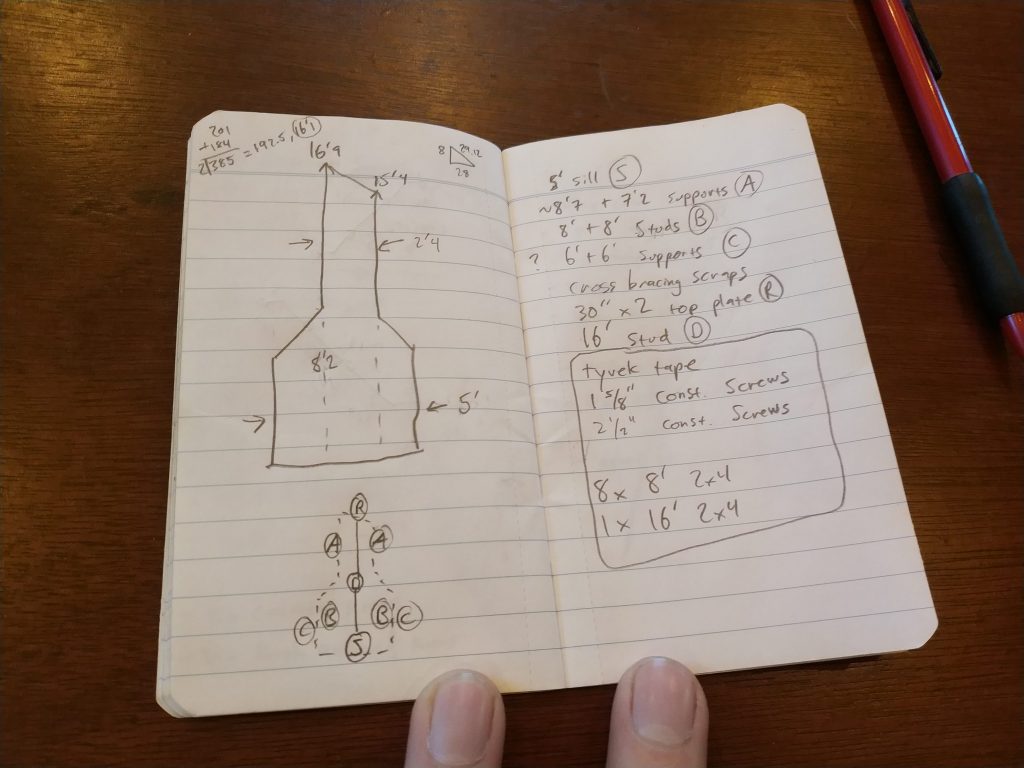
Start with a plan
As Norm says, measure twice and cut once. I make myself a little diagram with measurements so I can figure out how much material to get, and figure out how to structure the wall I’ll be building.
Joke’s on him, we have the same hands.
From the measurements I was able to take, I figured out that I would need to make a 5′ sill to attach my studs to, then frame the opening in 2x4s to allow sheathing to go in at the correct depth. Then, I would add three additional studs, one at each dotted line and one at the middle of the opening, all the way to the top. After I made a rough cut list, I calculated how much wood I would need to buy, as well as any other screws or supplies I didn’t already have on hand.
To the HARDWARE STORE! The happiest place on earth!
I started out looking for the oddest piece, the 16′ 2×4. They had a good number of them to choose from luckily.
Picking a piece of wood
It’s easy. Just ‘sight’ (look) down the piece of wood and see if it’s all wonky.
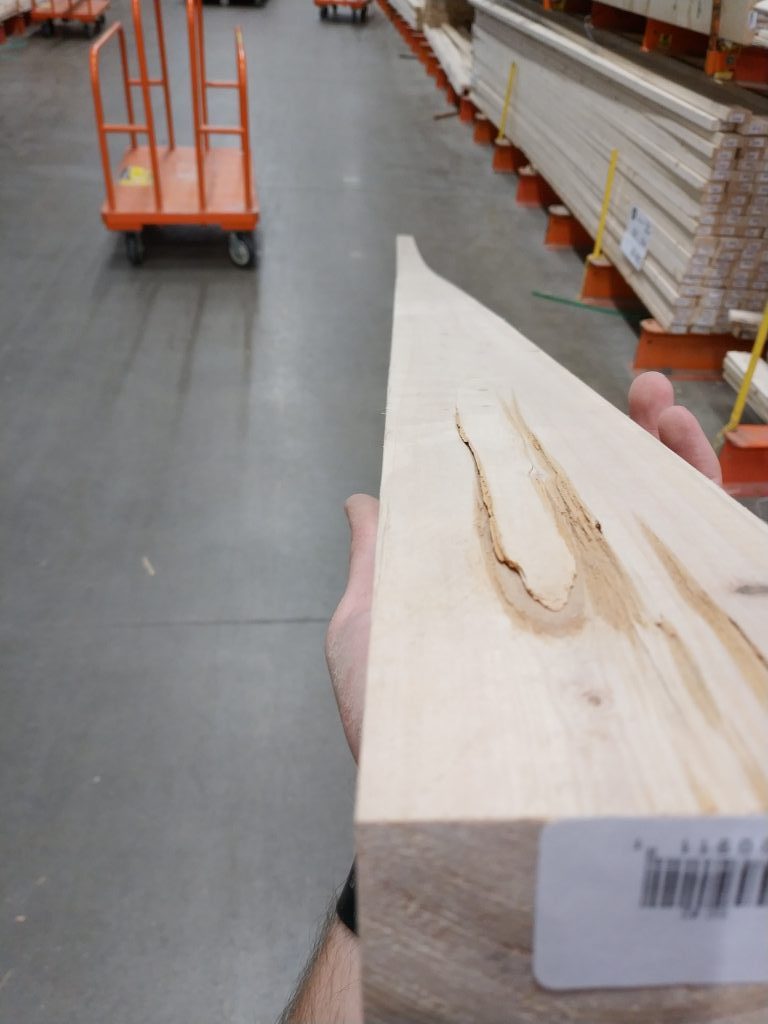
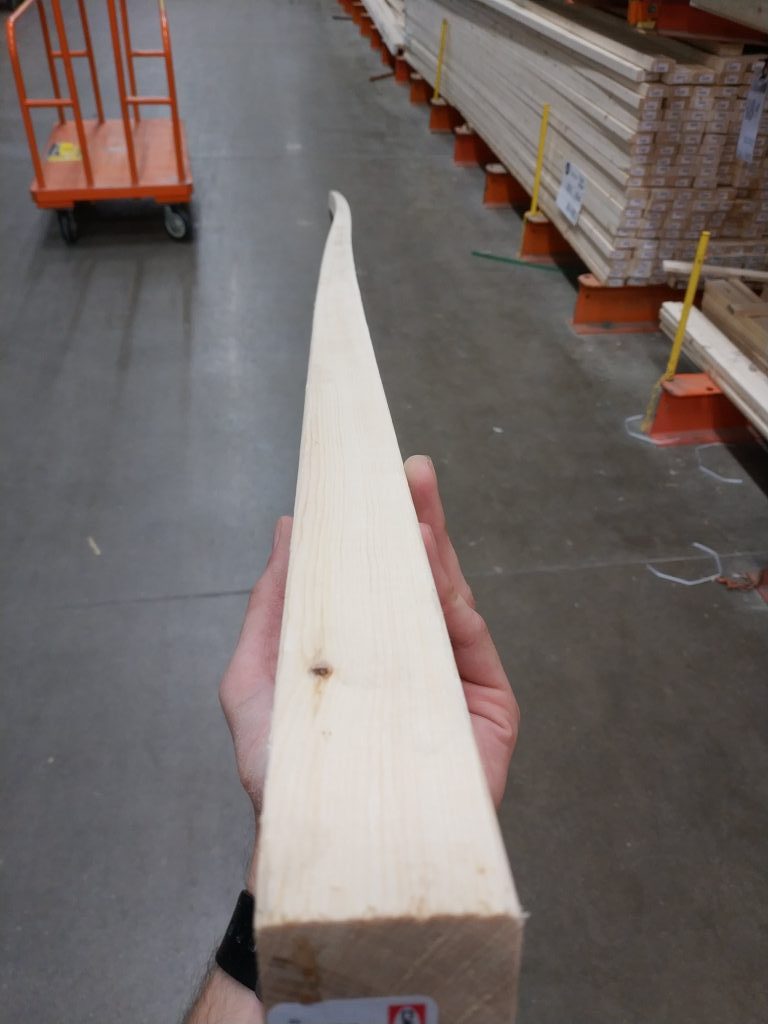
This was the best one I could find in the stack, and since it’s so long and I’m not using it structurally, I don’t mind picking a bit of a weird piece.
The only thing left is a handful of studs, and we’re back to wo-
Yep. They were OUT OF 8 FOOT STUDS. Sure, I could by 16 foots and cut em in half but that’s rather a bit more expensive.
Ok, I gotta make another quick trip. I’ll be back once I find the lumber I need…

Hmm. I thought that the portion of wood that was at the bottom of a wall was called the “sill” or “sill plate”. I only know this because I got an estimate on the house I recently sold that had a totally rotten “sill plate” all the way around the house, because it basically sits in a swamp with a water table much like the Mississippi delta. We lived in the Swamp Hut (as we lovingly called it) for 24 years and had to decide whether or not to revamp that whole portion or sell “as is”. Since we had just done 5 years of construction on our new place, I decided to take the easy way out and do the “as is”. Why? Well, to water proof the crawlspace, replace the sill, do some repair of the foundation and some rotting joists (in order to pass inspection)? About $27 thou. Then take away the standard realtor fee, closing costs, etc, I would have made a lot less. The lovely all-cash-buyer guy didn’t even care what shape it was in, he just bought it and passed the Swamp Hut on to some big corporate house-buying place. I have no idea what transpired from that point on and frankly I don’t care. We got out and never looked back. 24 years of 60% humidity ruining everything we owned was enough. Anywho, yeah… sill plate is the nomenclature which was used in the quote I received. Learning is fun!
A sill plate would be “on the flat” on top of a concrete foundation, and then studs would be attached to that in my experience. I’ve usually seen these as a 2×6 where the floor inside is also concrete, i.e. no basement, since there are no joists. On multistory houses I generally see a rim joist on the outside, to which other joists would connect. This would form the first floor of the house and the joist-and-rim-joist matrix would sit directly on the block foundation.
There are dozens of ways to create the joint between wall, floor, and foundation, some of which include both sill plate and joists, too, which I have been happily reading up on in the Audels Builders Guide 🙂
I can easily see why that job would be so expensive, someone would have to jack up and shore the house while the sill plate, which the whole house sits on, would be taken out and replaced. You definitely dodged a bullet there finding such a lenient buyer!