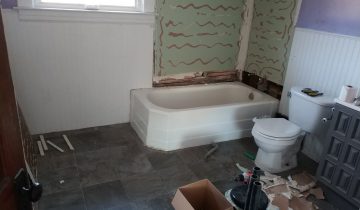
Time to thaw out the blog! Our Michigan winter has been issued a temporary stay for the weekend, so we took that opportunity to check out if there had been any damage from the -35F windchill last week.
As we know from the last post on winterizing, the hoard is, more or less, preserved against the cold. We didn’t expect any burst pipes or broken toilets, because, well, there’s no water. And, we didn’t look for crumbling masonry, sloughing plaster, or broken down furnaces, because all of those things are already doing those things that we don’t want them to do. Really all we wanted to know was, “Is there any water getting inside?”
Well, there is.
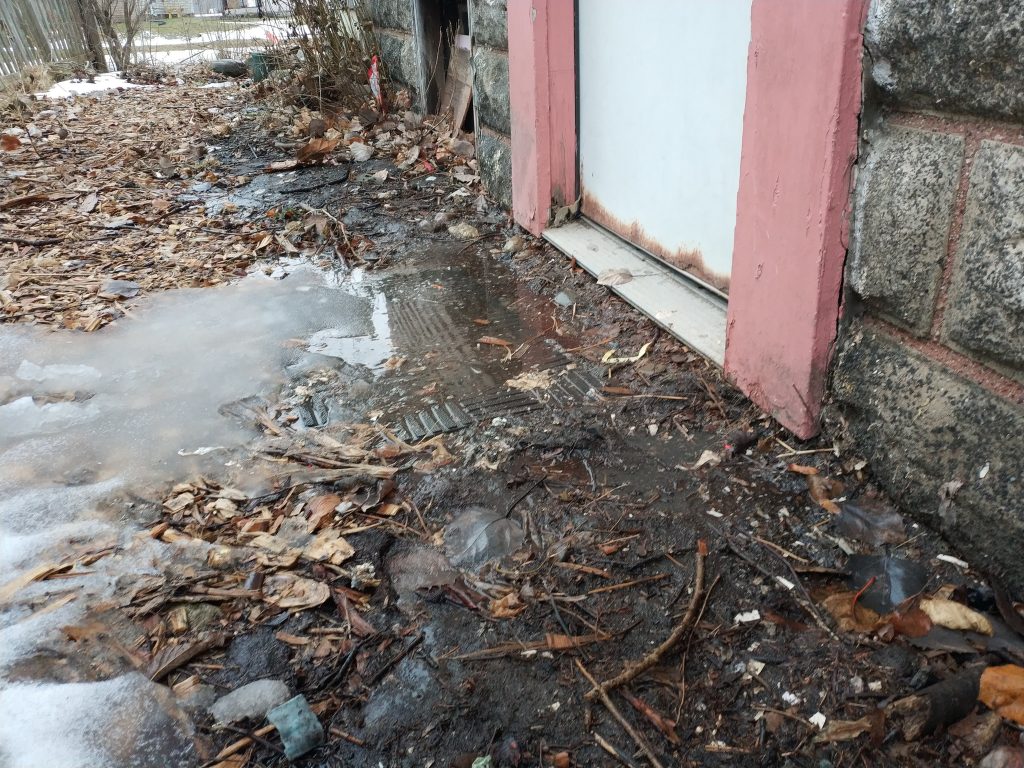
Water just rolls right off!
The high temps today were nearly 50F, clearing the roads and draining the low spots via the quickly thawing ground. The puddle you see above didn’t last long, as by the next morning, it had migrated into the water table.
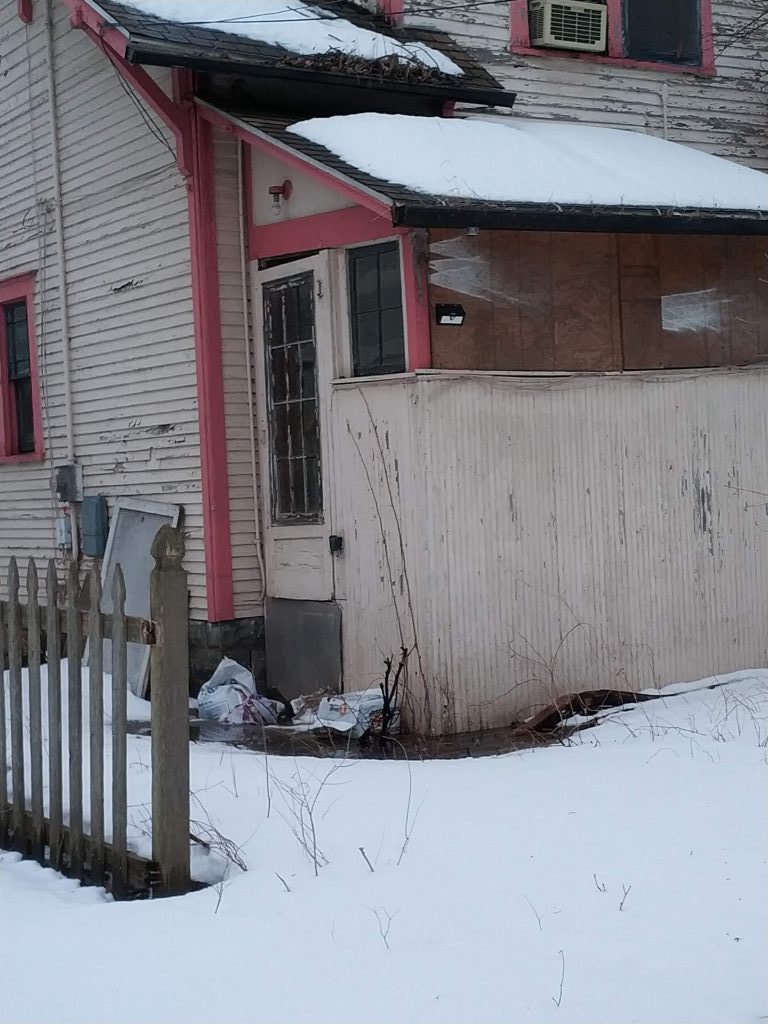
Luckily (or unluckily) there is no real house foundation under this back mudroom, so this pond didn’t do any more damage. Though, this lack of foundation could tell us a lot about why there is a wedge shaped gap at the top of that door.
Grading
The current main entrance to the house, the side door, has a pitiful threshold, essentially level with the ground.
Just barely above, though!
This would never fly in modern builds; a curb of 4 inches or more should separate the actual house opening from the exterior grade. Inside, however, the landing for the basement stairs is on the same plane as the aluminum threshold, so there’s not much to be done about that without rebuilding the interior stairs.
There is a puddle in front of this door, which lets water sit against the foundation. But, we can’t grade it away easily because of the height of the door.
Ah. There is that, though.
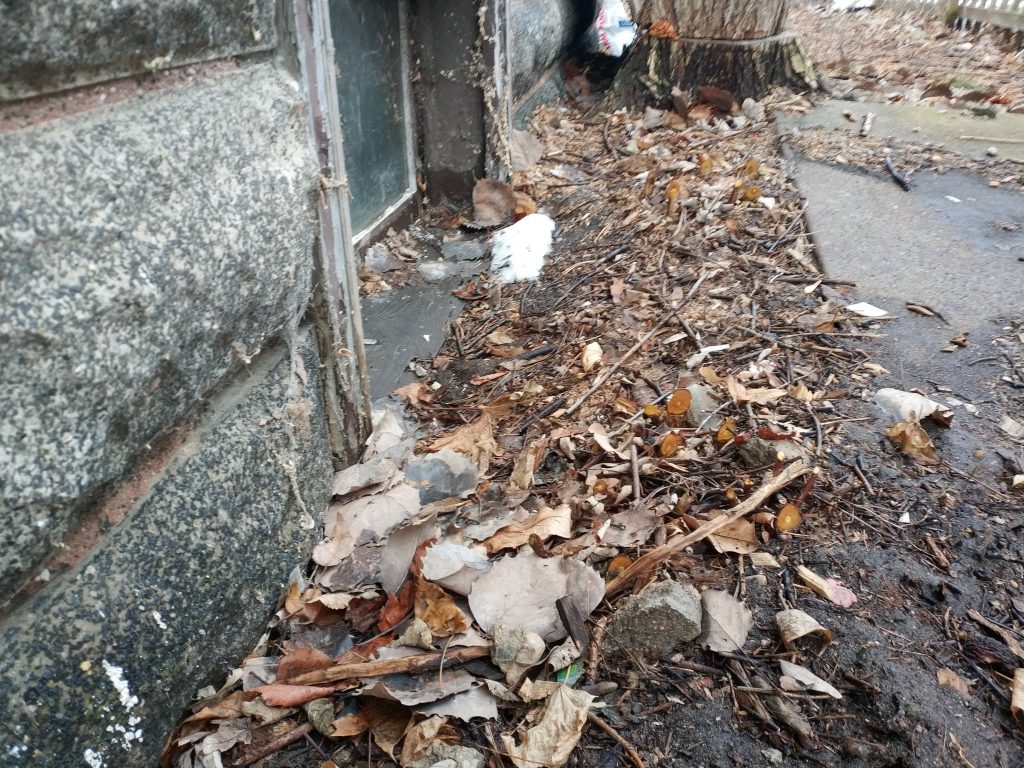
The basement windows are another story. The concrete path either heaved or was poured (on purpose) above the grade of the basement windows. The dirt between them is pitched towards the window, so I expect that some melt made its way towards this window and migrated inside.
Both issues could be fixed with better grading towards the edge of the property, removing dirt at the furthest point and working a gentle slope up to the house. But, at the fence line, water already pools, and adding grading would make our side yard a lake. This will either have to stay as is, or a more complex water removal route planned out.
Probably that first one.
The Basement
Since it was right nearby, we started by checking out the basement. There was a trickle trail of water leading to the supposed floor drain.

Yeck.
We don’t actually know if it’s a floor drain. It could be a sump, though there is no electricity connection nearby. It could even just be a literal hole in the foundation. It’s filled with sand, so we would have to dig it out to be sure.
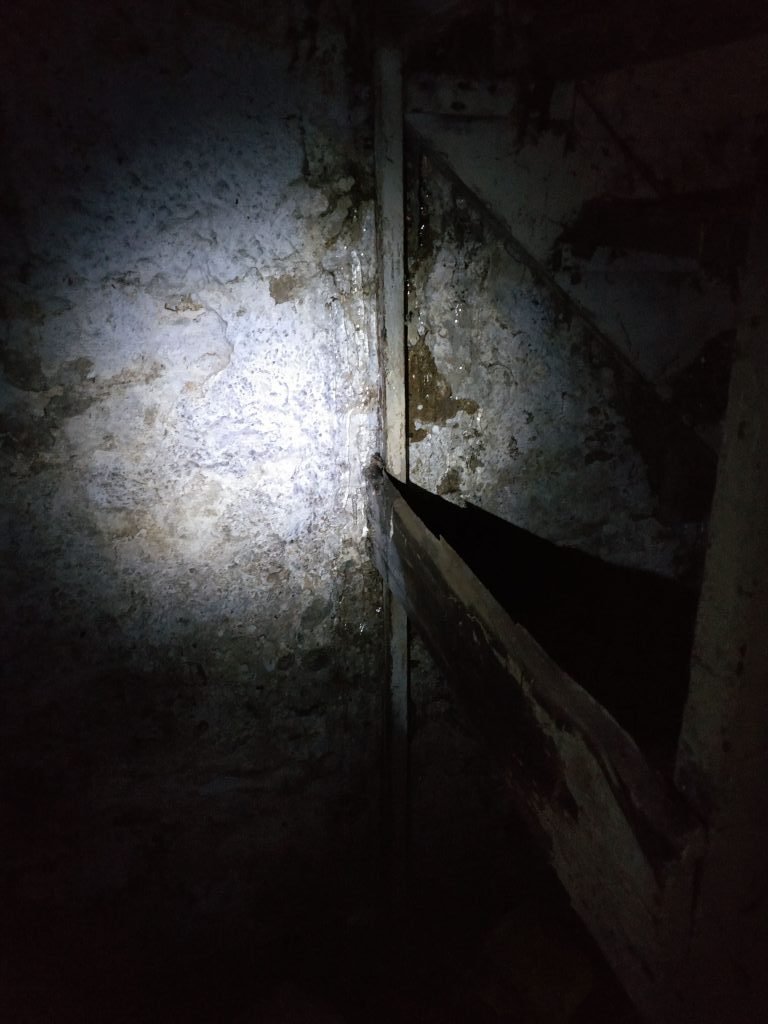
But this water came from somewhere. On the stairway, by the other basement window on the north side, we found an icicle attached to the wall.
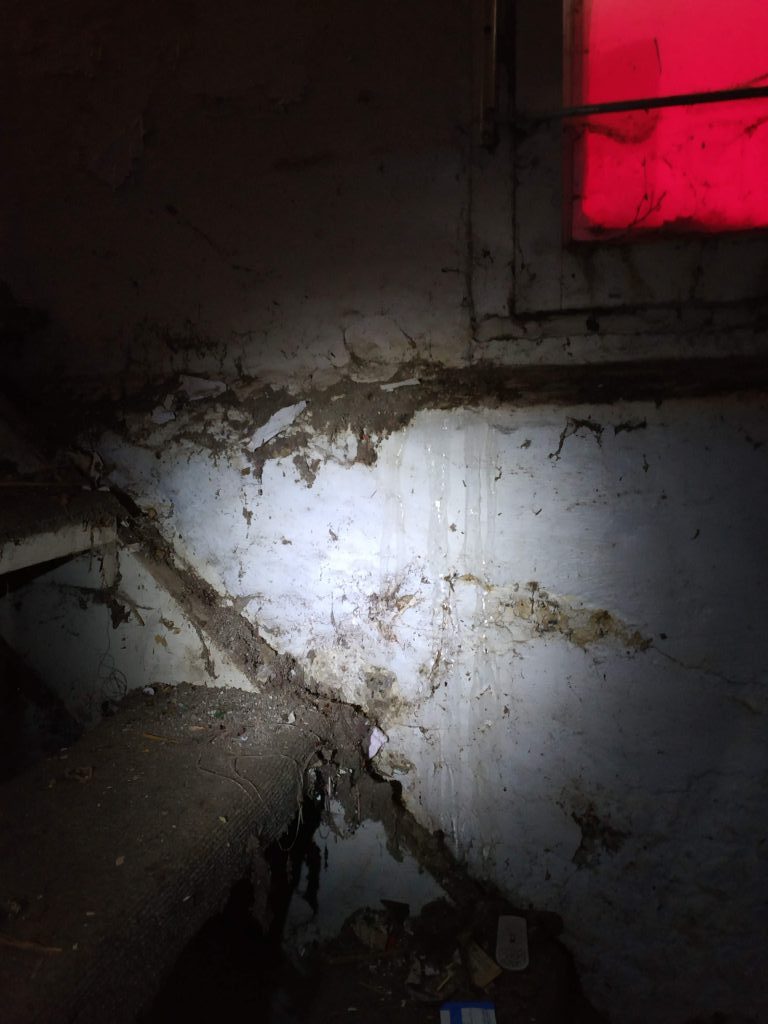
At least it’s not coming in the window, right? Right?
Well, that’s not what you want to see.
The water is coming into the basement between the poured portion of the foundation and the above-ground brick portion. It’s actually a common failure point; we’ve patched this area in a few places at our own house. Cleaning out the joint and adding some special waterproofing caulk should tend to that.
In this case, the wood sill in contact with the poured foundation is rotting away, but the same fix should apply. This and all the other basement windows, though, should be put under consideration for replacement. Glass block would slightly improve insulation and security, too. This gives us the opportunity to remove the rotting sill at the same time.
We found a few more points of leaking water under the other north basement window, at the same points. We also noticed the main cause of the water trail in the basement, which was the sill for the side door.
Those stairs are more rickety than previously imagined.
Probably want to take that out and replace the wood sill underneath it the same way. The side door inconveniently swings inward as well. Making it swing out would be a security issue, because someone could tap the pins out of the hinges and take the door out from the outside. But, special hinges can be bought to mitigate this. And, replacing it with a better insulated steel door would be great.
Upstairs
We did tour the upstairs and found little to no damage. Well, new damage, anyway. But, when we checked out the closets, which suspiciously already were missing a lot of plaster, we found some wet lath boards.
That means roof leaks.
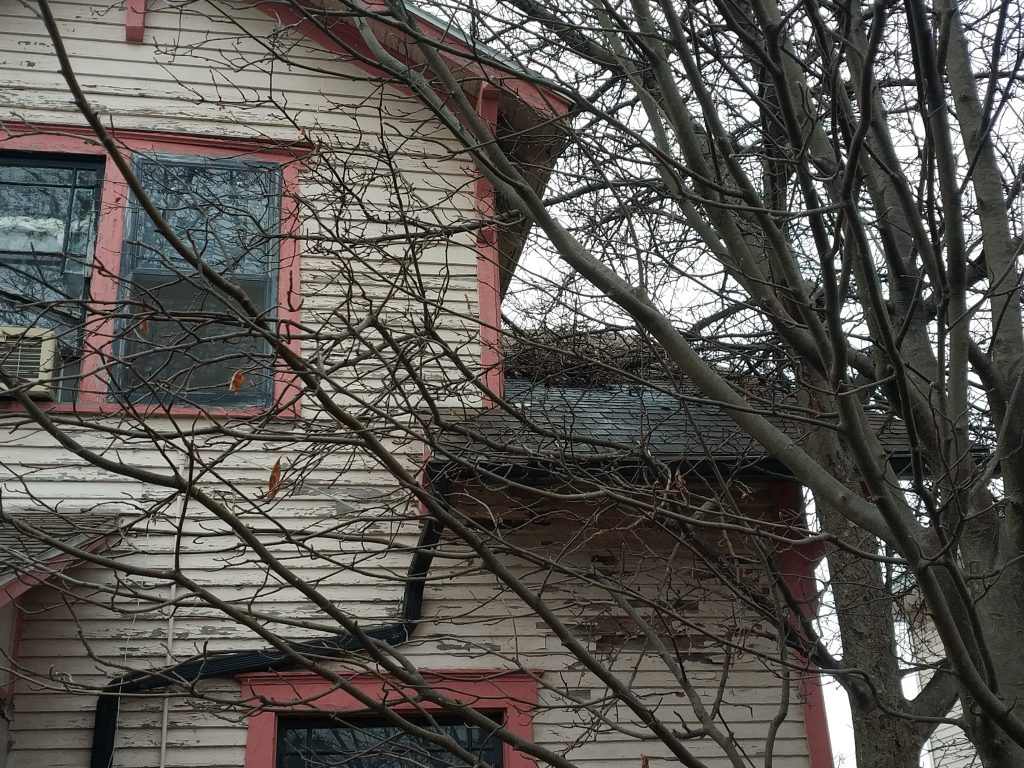
Both of the closets on the south side, which abut the apple tree and the chimney, were wet. The north closet was dry, as was the stairwell. No surprises with the chimney closet, whose falling bricks possibly damaged the roof, but what about the other one?
Oh. Well.
This suspicious pile of sticks and leaves, as well as branches rubbing against the closet roof, could likely be the culprit! They are retaining water against the face of the roof, allowing it to wick up under the shingles. Clearing the mat and trimming the trees away from the house will keep the water off, but this section of roof may need new decking and shingles.
Conversely, this is the north side with the dry closet.
But… all the water…?
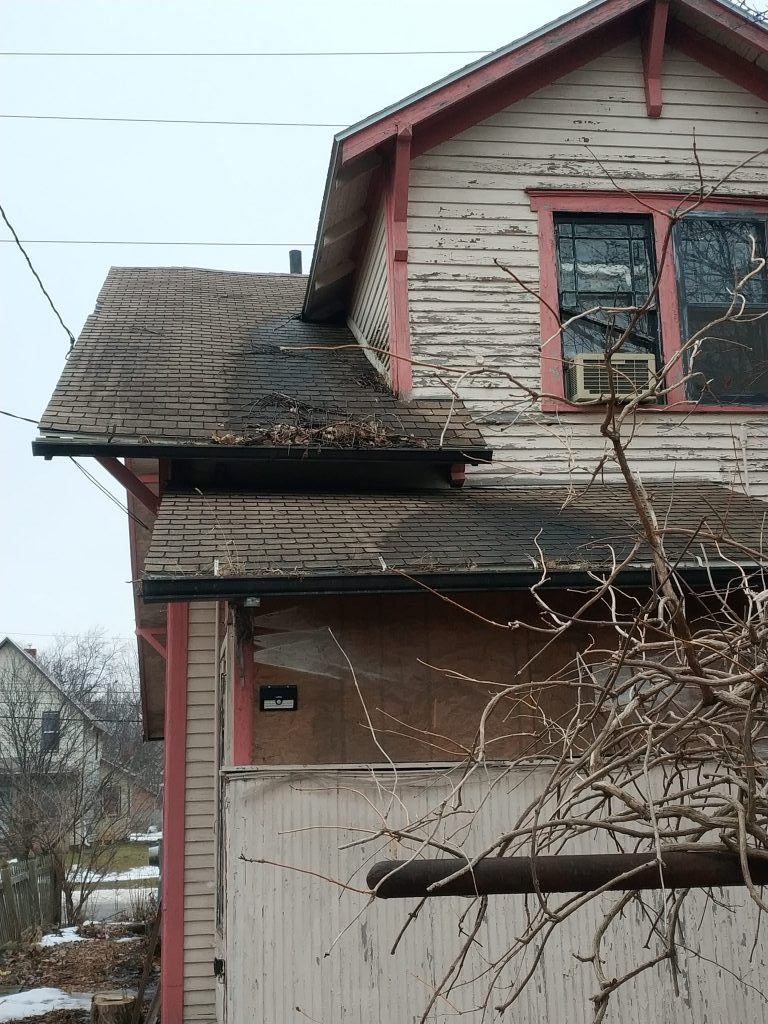
The first thing one might notice about this picture is the weird roofline.
Fuggedaboudit. The roof extends past the edge of the house by quite a bit, and is only supported by a few decorative corbels. If the roof is bad enough, we’ll fix the dip with redecking, but it’s supposedly rather new, so it should be a candidate for patching.
The next thing one might notice… well there are lot of things, but let me draw your attention to the wet spots. Luckily this is the dry closet, so the roof is doing it’s job. But, there are a few critical pieces of a certain linear water removal system which are missing or clogged.
Gutters
Gutter systems are one of the best ways to keep water damage off of your house, and in many implementations, are the only way. This moves all of the water that fell onto your roof to a safer location far away from your foundation. This water would normally roll off the edge and cause erosion of the dirt under the drip line, or allow water to stay close to the foundation as it travels through the soil. This can either wash away the concrete, or migrate through and cause a wet basement, or both.
A good gutter system does not deposit water anywhere while that water moves between gutters. Once water is collected, it stays in the system until the end of the final downspout. This prevents running water on your shingles. It also has long returns on its downspouts; about 4 feet. This keeps water well away from your foundation and gives it plenty of surrounding soil to soak into.
There appears to have never been a gutter on the dormer. All four edges on both the front and the back dormers have no gutters, and no signs of affixment points. I’d like to add gutters here which drain directly into the next level down.
The end of the roof on the rear, which I learned is called a ‘saltbox’ style since it is longer on one side (the front), has a gutter with no downspout opening or end caps. I can’t tell if there ever were endcaps (probably not, if there is no downspout opening), but the fact that they are missing is causing water to simply spill out of either end. This goes onto the dirt below at the corner of the house, or onto the roof of the mudroom. It seems to be pitched in the former direction. But, because of the large clog from the trees we took down a few months ago, it can only be directed to the latter. This should have a downspout to connect it to the next gutter.
The mudroom gutter is fine, if not also clogged with sticks and leaves. But, it too has no downspout, and this is the final level, so the water splashes down into the puddle we saw before.
The front of the house has one gutter at the edge of the porch roof, but again, no downspout. The previous owner put a potted plant under it to catch the torrent. This soon grew into a tree which burst through the pot and is now firmly rooted to the spot.
Getting Gutters
Gutters are inexpensive to purchase, but hard to install, as they are quite long and must be carefully pitched while suspended in the air. Self-installed gutters have seams every 10-15 feet on long runs, because pre-made sections can only be sold in so many lengths.
However, custom-installed gutters from a professional are of exact length, because they are formed on site.

Not my trailer.
These are fitted with a roll of aluminum, which is formed through several stages to end up with a fixed gutter shape. These can be of infinitely varying length with no waste, as they are trimmed off of the machine directly. Because there is little waste, and since seamless gutters have fewer joints and are therefore easier to install, the cost of having seamless gutters compared to the hassle of installing your own is very low.
That being said, the hoard has a grand total of 40 feet of gutters. 20 on the front, 20 on the back. Would it be worth a contractor’s time to come out and make 40 feet of gutter? When the average install is around 200 feet, probably not. Can I get black gutters off the shelf, along with color matched parts needed to install them? Heck yea, plus, I’m armed with the internet.

Great to see you’re back into it. I thought you’d been overwhelmed by a sentient patch of Poison Oak.
It’s not gone forever, just lying in wait…