Think back. Think waaaay back. The year: 2019. March. We made a list of the things that we wanted to get done in the hoard when the weather finally started agreeing. The shortest and easiest segment is that on natural gas; just disconnecting and capping a few lines. Let’s get to it!
Most houses are equipped with just a few appliances that utilize natural gas. A furnace, a water heater, and maybe a stove or a dryer.
Well, the hoard has five, including all of those, plus an in-home incinerator. Since the most likely plan for the hoard is for it to become a rental house, the safest options for laundry and cooking are all-electric. This means that three of the five appliances can be disconnected, making a much simpler gas circuit with fewer possible points of failure. Luckily, there is already an electrical hookup for a stove in the kitchen, on the other side of the wall, which is where we wanted it to begin with.
Now, every plumber in Christendom will tell you that you should not mess with natural gas piping yourself. You need to carefully calculate flow volumes, supply the right pressures to your appliances, ensure properly fitting connections, reduce friction in the lines, secure your pipes correctly so they do not leak, and so on.
And, they would be right. Installing a new natural gas system takes a lot of planning, including how many BTU’s (British Thermal Units) each device will produce at max capacity, how far away they are from your meter, and what other devices will share the same pipeline, among others.
But we won’t be doing any of that. We aren’t adding another appliance; we are removing appliances. This means our circuits would be oversized if anything, so devices should be supplied with plenty of gas. We just have to make sure that our connections are tight and leak-free.
The Tools
No officer, I can’t explain any of the tracks on Sides One or Two.
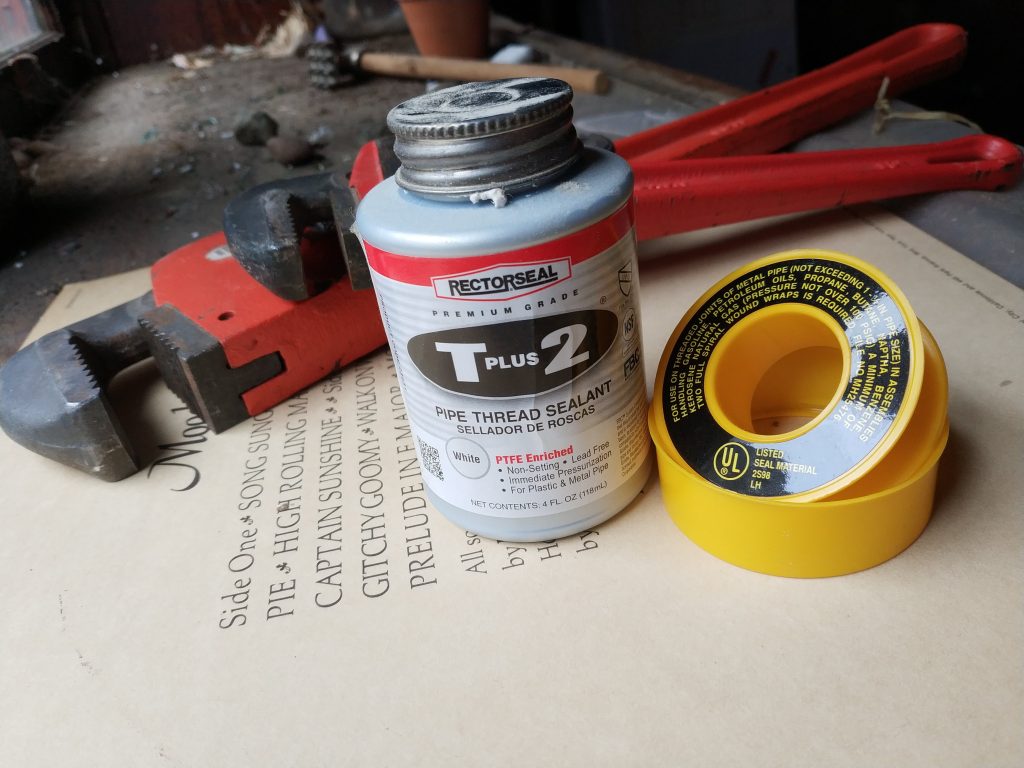
You only need a few tools and supplies in order to disassemble (and assemble!) threaded iron pipe. We have two pipe wrenches, preferably in two different sizes. This is useful when you can’t fit the larger wrench into a small space, or when the small wrench doesn’t open wide enough.
We also need something to seal up the threads when we put pipes back together. When you tighten a screw-in connection, there is actually still a very small hole that follows the threads. This has to be sealed with something that will flow into the cracks in the connection, and can stand the pressure of the gas (which honestly isn’t very high). This picture shows two options: yellow PTFE tape and brush-on PTFE sealant.
You can select either, but I like the brush-on stuff personally. The bottle has a little brush attached to the inside of the cap for convenience. Tape would be better for a smaller job, since it is less expensive and easier to store. I happened to have some of each, so I’ll show you both methods.
An important safety note: when you visit the hardware store to pick up sealant, you will find at least 50 different kinds of rolls and jars. Most of these will work with gasses, but some will only work with fluids. Famously, you might be familiar with the white teflon tape that is used to connect water lines. This stuff is THIN and will NOT work for natural gas. The package should say that it is designed to carry natural gas (among other things) through iron pipe (also among other things). Some tapes will deteriorate quickly in the presence of natural gas.
Natural gas is supplied to your house at somewhere around 1/2 PSIG, so pressure is not really a concern when you make a selection. Higher pressures are used for industrial applications, sometimes up to 60 PSIG. And, the temperature range of the sealant is also not a major concern, because if your gas supply pipes get up over 400 degrees, you have other problems.
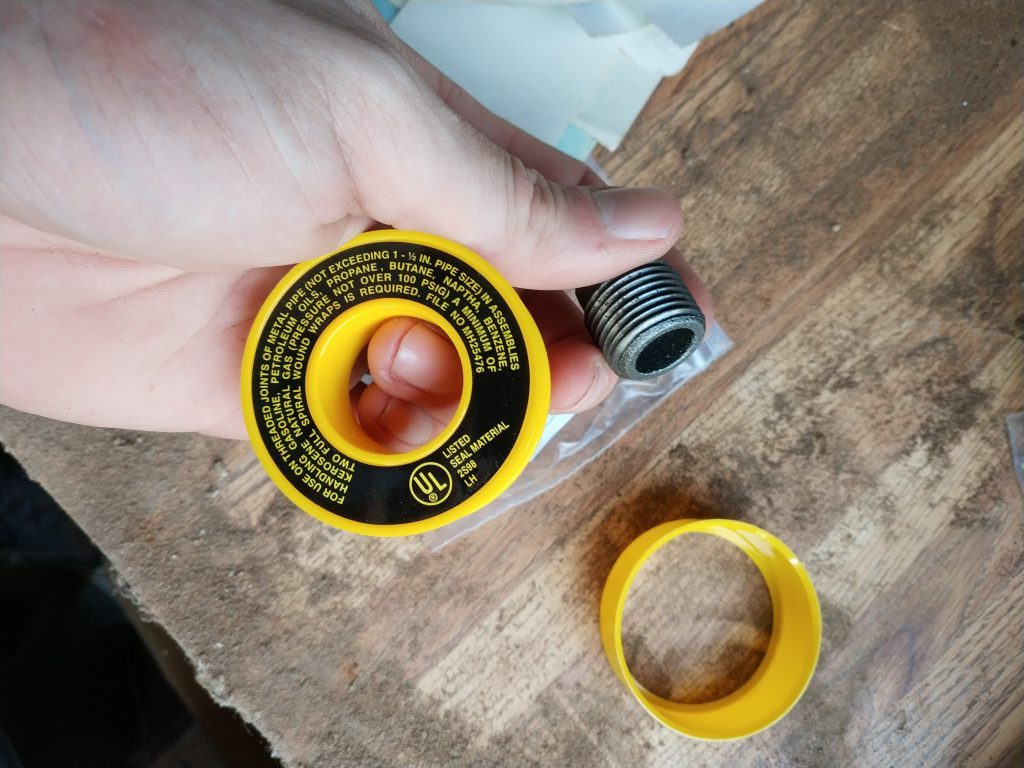
You can see right on the label of the yellow tape that it supports natural gas under 100 PSIG (PSIG by the way is Pounds per Square Inch, Gauge, which means that’s the difference between atmospheric pressure and the pressure in the pipe being measured). It also is good for “metal pipe”, which we have, and at sizes under 1-1/2″ diameter. Our pipes are all 3/4″ and less.
Disassembly
It almost goes without saying, but I’ll say it. TURN OFF THE GAS BEFORE YOU START. The hoard has no gas meter, so there is no gas, but look for a shutoff valve on the utility’s side of your gas meter, and give it a quarter turn. It should be perpendicular to your gas line when off.
Since pipes are all screwed together, you can’t just reef on the one pipe you need to disconnect; you will be tightening the connection at the other end. So, you need to work your way back from the end of the line, towards your eventual disconnect. There are spots where we can fast forward a bit, and we’ll cover that in a bit.
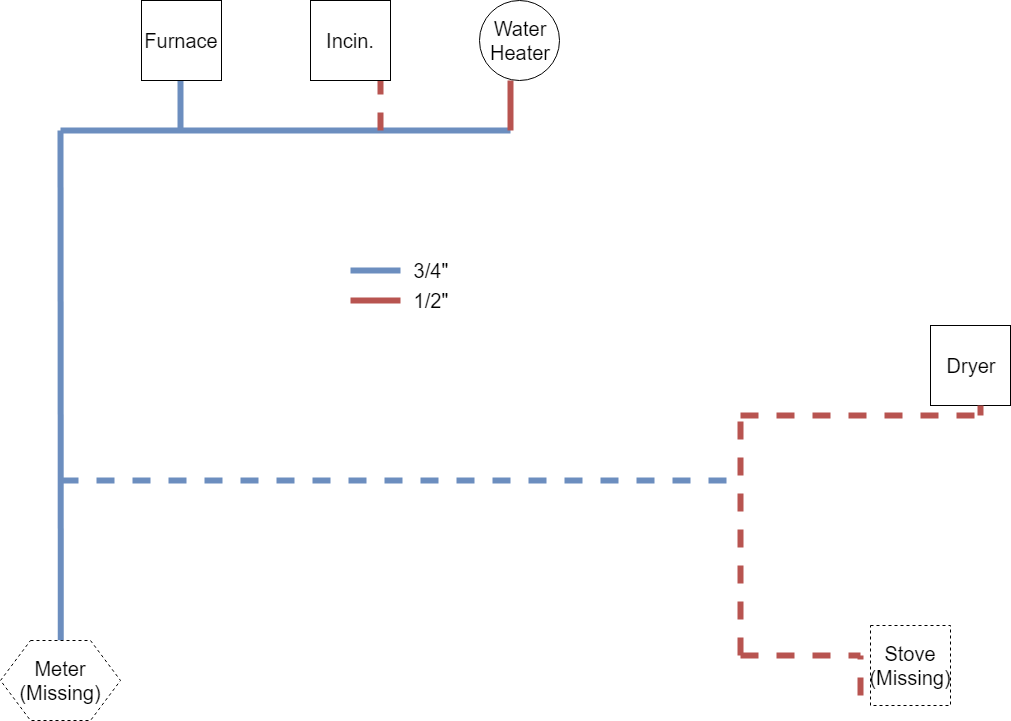
There is one major branch that I’d like to remove, and one small connection off to the incinerator, indicated by the dashed lines. So, I started upstairs at the stove connection.
Ah, yes. Forgot I had to rip that out.
Now that I have the appropriate wrenches with me, removing the valve here will be a breeze. Slip a wrench on each side of the joint you intend to unscrew. Pipe wrenches can only turn things in one direction, because of the shape of their jaws, so pay attention to the direction, and flip the wrench over if it isn’t working. They also tighten a bit as you push, but hand tighten the adjusting nuts as much as possible to cinch the teeth into the metal.
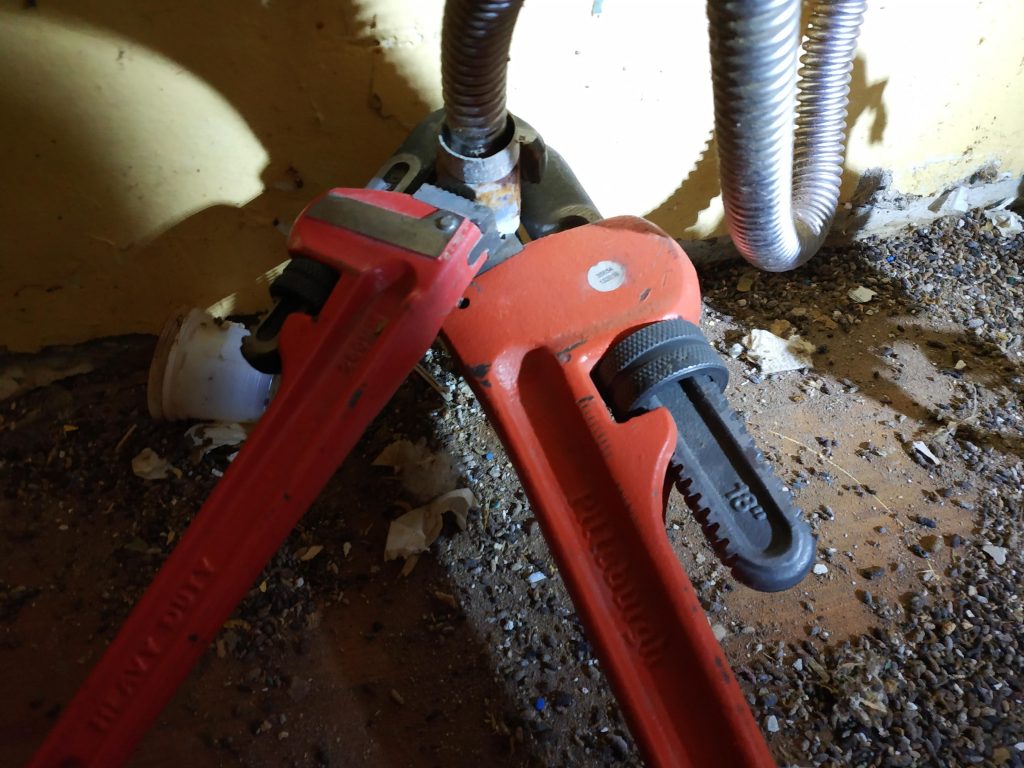
Note the direction: always push away from the adjuster nut.
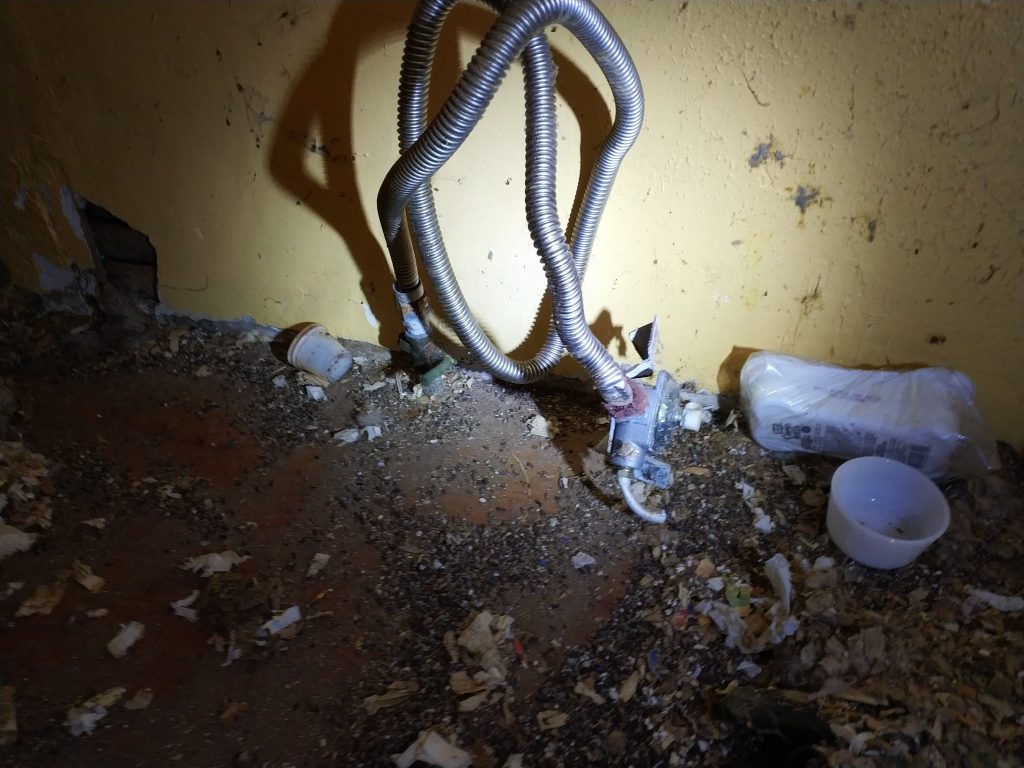
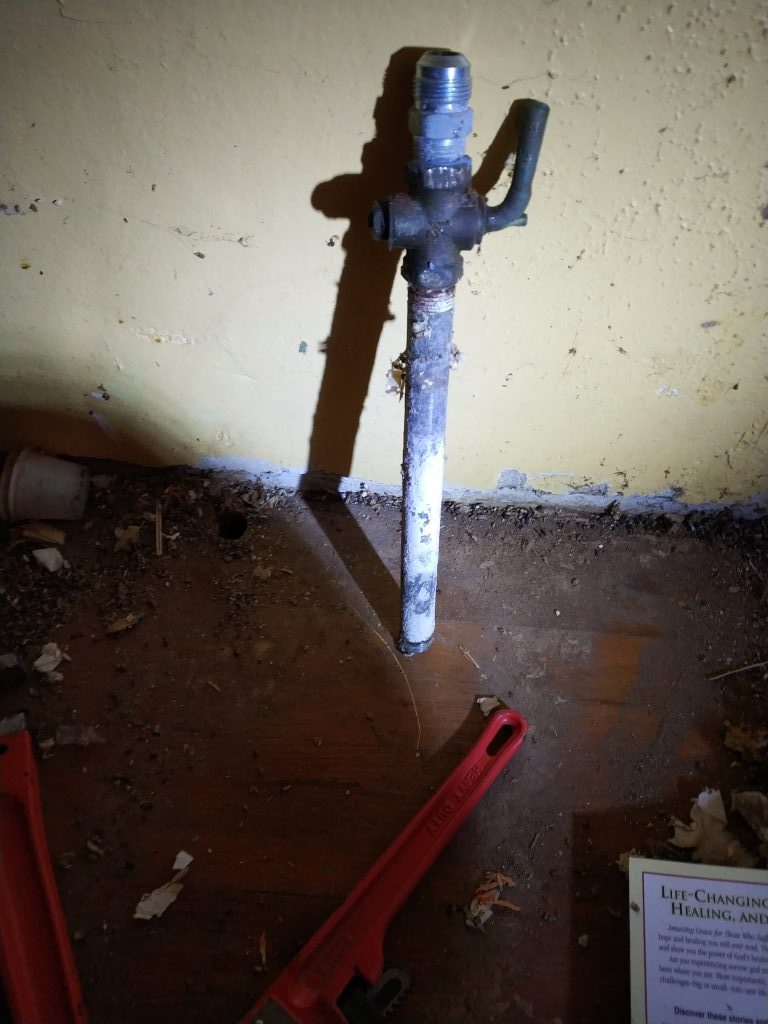
Once the flexible connector was off, I was left with a stub in the ground that I wanted to unscrew from the pipe below. I wasn’t able to hold a wrench in the basement and the kitchen at the same time, so using one wrench at the floor level works just fine. These smaller pipes break free rather easily, and gas lines shouldn’t be rusty. Steam pipes are a different story.
If you are having trouble getting enough leverage, you can use what is known as a “cheater” pipe, which is just a longer pipe you slip over the end of the wrench to get more leverage. Bring your wrench to the store and get a 24″ galvanized pipe that fits nicely around the end of your pipe wrench. Don’t use this pipe for anything else, because you will mess up the ends of it as you use it, so it won’t seal very nicely.
Once the pipe has spun around 360 degrees , it should be loose enough to undo by hand the rest of the way.
Our first piece of construction debris! I think I’ll get it bronzed.
This is what I ended up with. I would discourage you from reusing anything you remove from an old system, so all of this is scrap now. The threads may have degraded, you may have warped the pipe when you unscrewed it, etc.
Unions
How do you tell the difference between a plumber and a scientist? Ask them to pronounce “unionized”. A union, in terms of plumbing, is a spot where two segments of pipe can be joined without having to rotate either section of pipe. This is handy if you have two immovable objects (like a meter and a furnace) and need to screw pipes to both of them and meet in the middle.
A union in its natural habitat.
To ease assembly of the stove circuit, two sections of plumbing were added, and then a union added so that the pre-made parts could be fit together. This also helps with performing maintenance. Say, for instance, that you are changing out your water heater. You can undo the union by the appliance and pull it away, and then insert a new pre-piped appliance, then screw the union together.
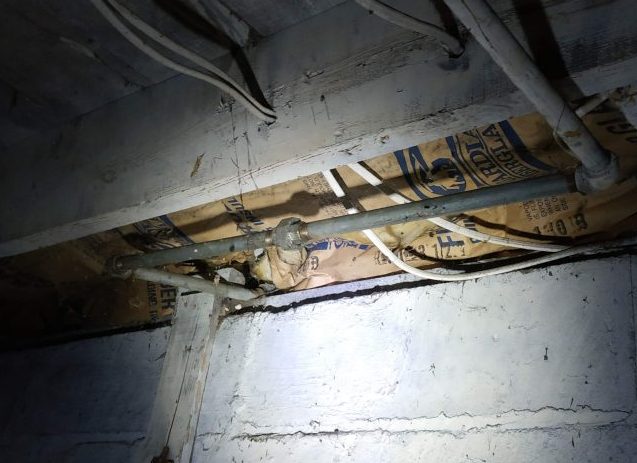
Undoing this union saves me 2 or 3 extra disconnections, so I pulled this union apart. This led to a bit of a problem:

Pulls a bit to the right. You can see it canting over the dryer pipe, too!
This pipe was not strapped to the ceiling when it was installed. This was convenient for removal, but if I were planning to keep any of the other piping in this circuit (for instance, the dryer), then I would have wanted to support the pipe so I wouldn’t stress any other joints. This could cause the pipe sealant in the saved sections to crack and leak.
There was another union for the dryer, which I disconnected. Here’s what they look like undone:
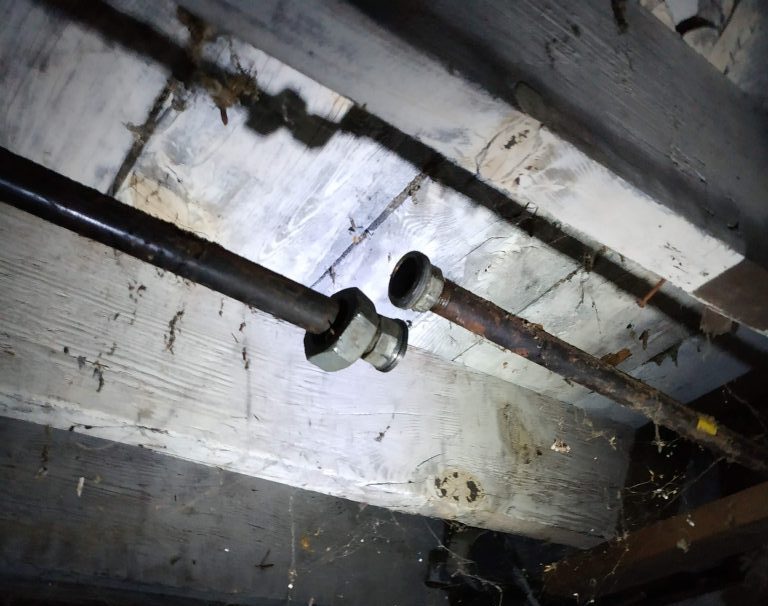
Now I don’t have to climb the washer!
When undoing a union, one side will have visible threads, and the other will not. Unscrew away from the threads. Unions also do not need pipe dope on the final threads, since the sealing is done by compressing the flanges on each side together, rather than the action of the threads.
This here is a pressure regulator, which will step down the pressure on the appliance side to something lower (usually from 2 PSIG to 1/4 or 1/2 PSIG). I can’t imagine why it was installed here, since gas stoves have built-in regulators. But, out it comes.
Ignore the open hole! I did that.
An Installation Error
Someone made a gaff when they set up the gas stove for the first time.
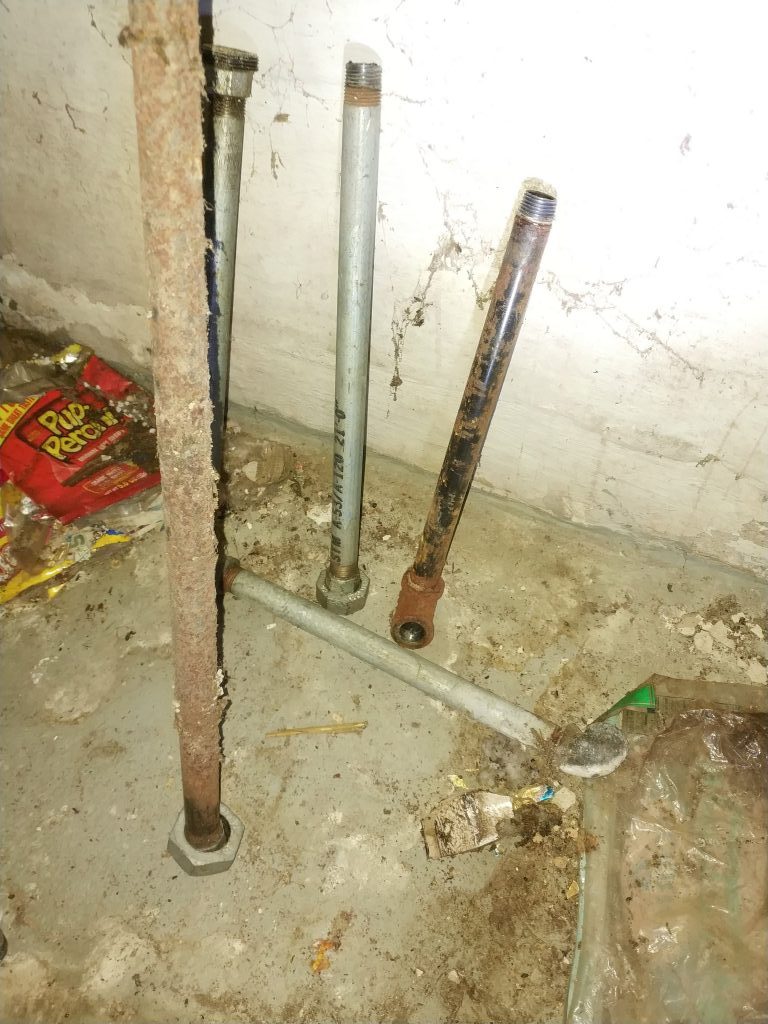
One of these things is not like the other…
Natural gas should be carried in ungalvanized piping, known as black steel pipe. Some of the pipes I uninstalled were correct. Some weren’t. As you see above, some galvanized sections were used. Galvanization can, over time, flake off and travel to your appliance, clogging up the gas jets. There are some cases when a gas supplier will use galvanized piping on the outside of your house, but this is exclusively to avoid corrosion.
Speaking of installation errors, let’s try not to make any ourselves, shall we?
Adding A Plug With Pipe Dope
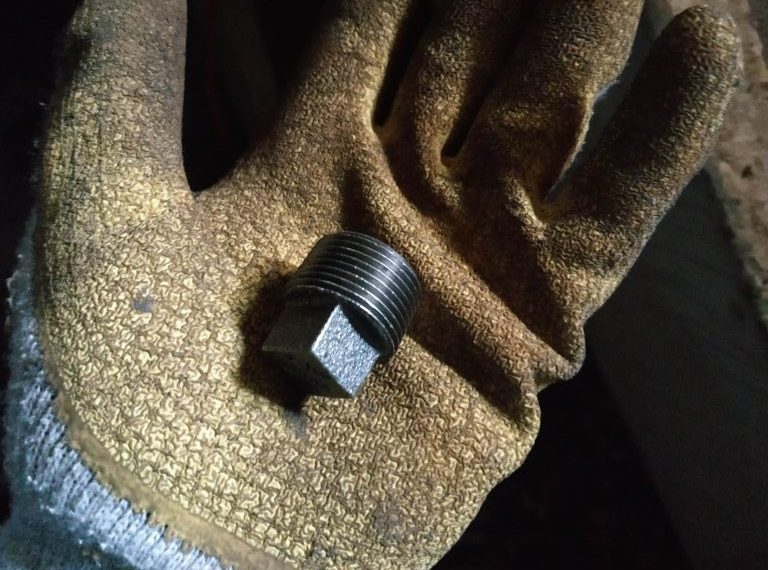
Replace 75lb of pipe with 2oz! Inspectors HATE him!
This is the plug we will be using in the tee that we opened by disconnecting the stove and dryer. To use pipe dope from a bottle, first we mix it up a bit using the included brush. It should not have any oils sitting on top of it, and should be an even consistency. Next, brush a thin layer onto the final 1/2 to 2/3 of the threads of the pipe you are connecting. You only need to add sealant to the male threads, so no worries about the fitting.
Can you still see the threads? Good.
This is a thick enough layer. Just enough to fill in the valleys of the threads with a nice fillet. If you add more, it will just be squeezed out when you make the connection, causing a goopy mess. I brush perpendicular to the threads to add some dope, then circumnavigate the plug to spread it out.
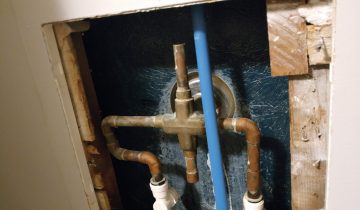
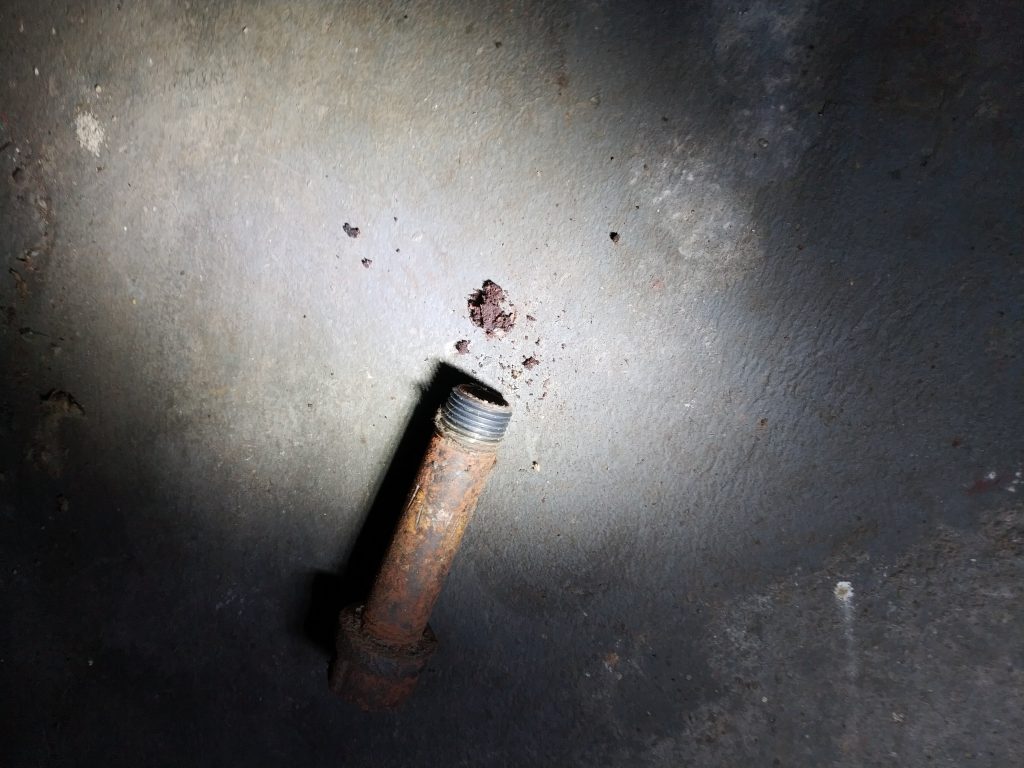
Here is the tee to which we will be connecting.
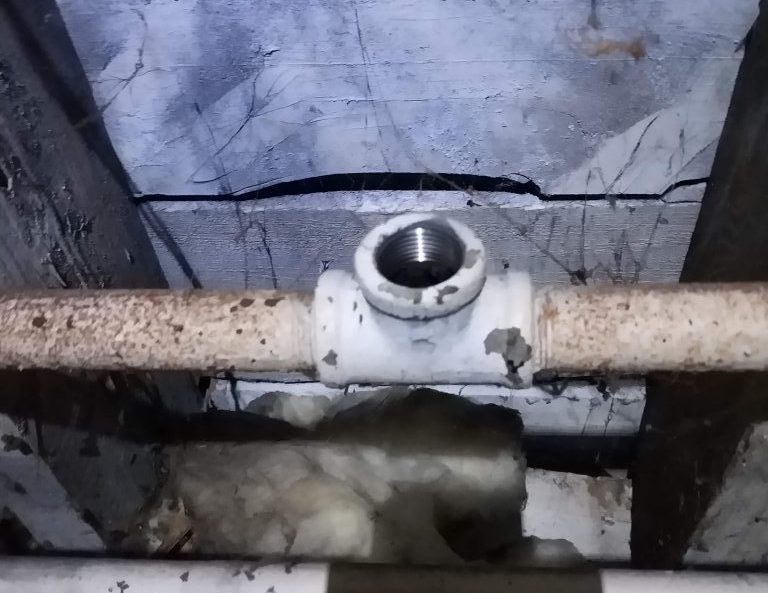
Ahh, nice and clean.
My connection was very clean when I disconnected the pipe, but you will want to make sure there are no granules in there. A wire brush will clean off the female threads easily. Thread the plug in, making sure it isn’t cross threaded. It should go in with only light resistance from the dope. Once it is hand tight, use a wrench to snug it up, and then apply almost as much force as it took to disconnect the pipes. You only need to make it tight enough not to leak, and the sealant will see to most of that. You don’t need to put all your weight on it. But, it should feel very solid when you are done wrenching. You should also see about 2 or 3 threads from the pipe or plug outside of the fitting when you are all done (accounting for extra pipe dope).
It is possible to over-tighten the connection, which can stretch or crack the fitting. But you would really have to be wailing on it to do so. Use an appropriately sized wrench to avoid applying too much torque. I used a 10″ wrench for this 3/4″ fitting.
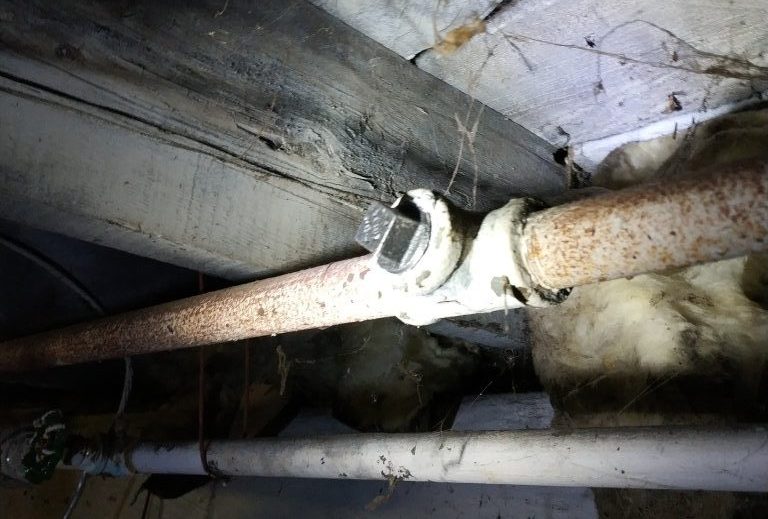
Snug as a plug in a rug.
Here is the finished connection. On to the next!
Removing The Incinerator
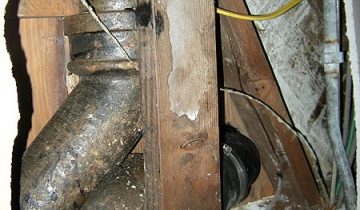
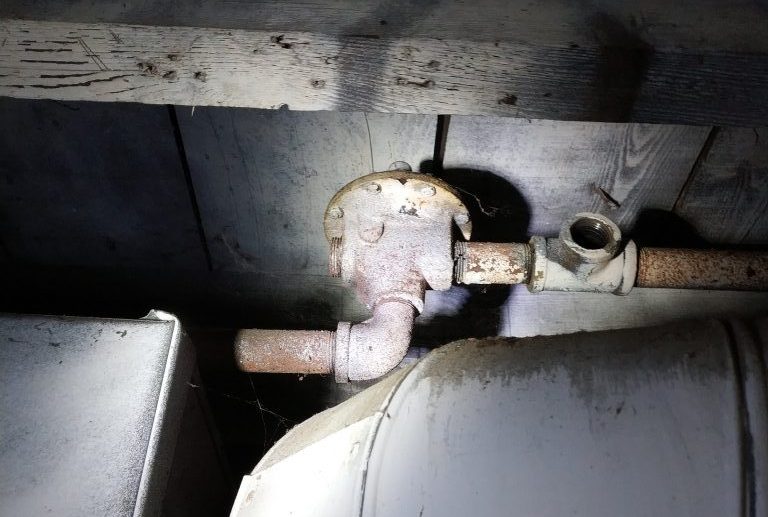
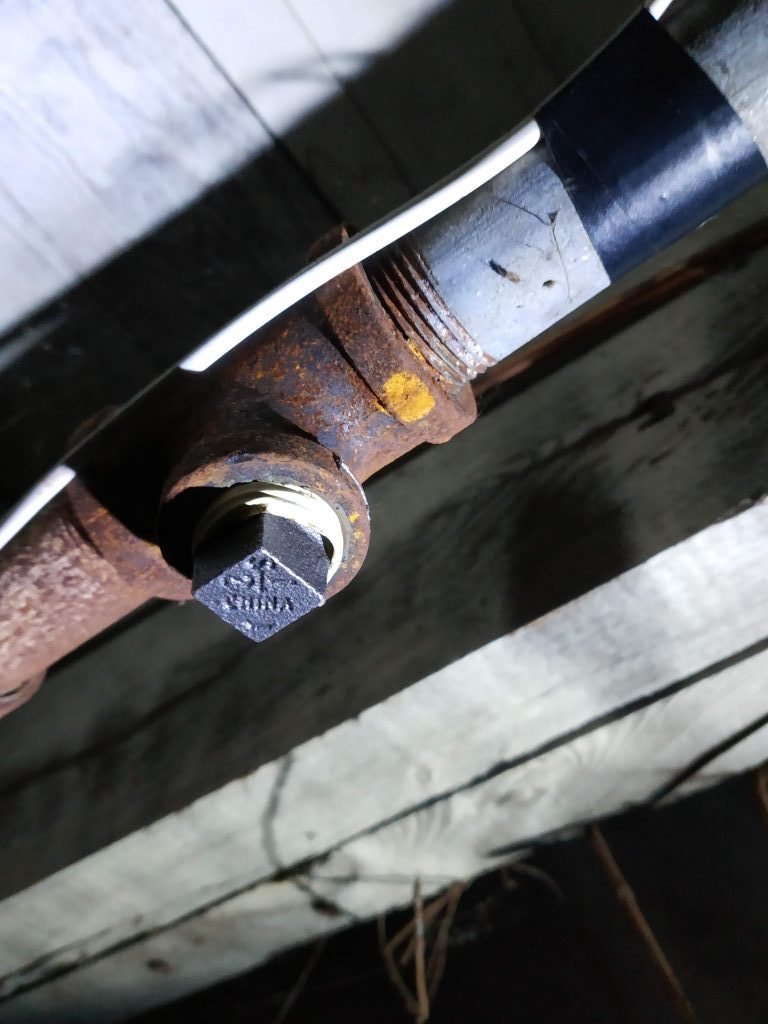
Since we have to start from a hard-piped appliance rather than the stove, with its flexible fitting, let’s look for a union to help us out. Here’s the gas connection to the incinerator:
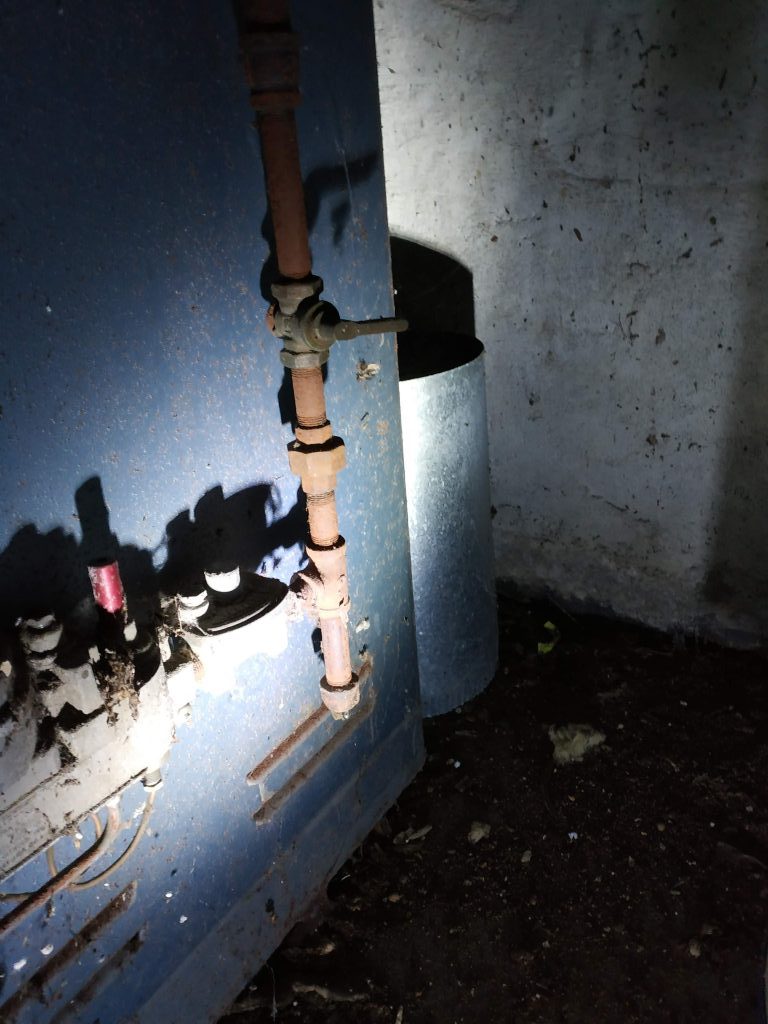
Booyakasha.
From top to bottom, we have a 1/2″ to 3/8″ reducer, a shut-off (off), our union, a tee, and finally a “dirt leg”. Whenever a gas pipe travels down, we want a place where dirt which may have accumulated in the system can settle. This prevents that same dirt from clogging up the gas jets, lowering efficiency or preventing ignition. This incinerator was installed in ’72, according to the sticker, so it should have 45 years worth of dirt in there.
Hmm… how much dirt is that?
Meh.
Not a whole lot, it turns out. 1/2 of a teaspoon of… something.
Anyway, after disconnecting the union, we unscrew pipes all the way back to the trunk which feeds the water heater. Easy.
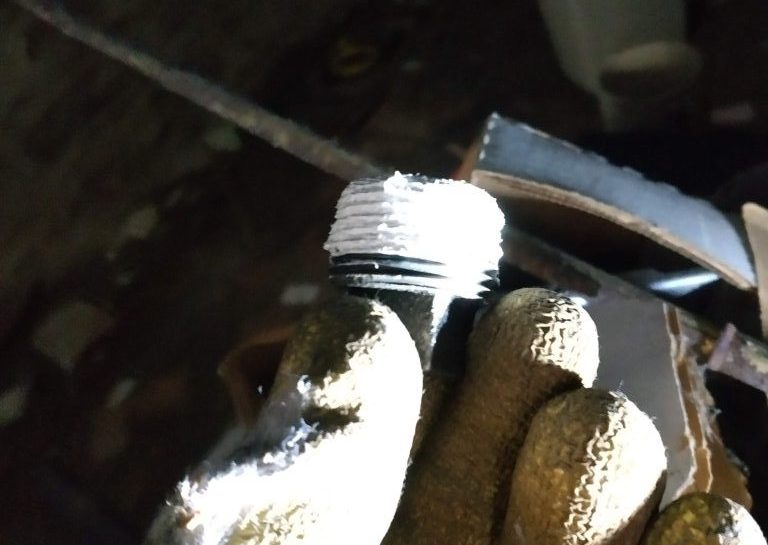
Adding A Plug With Pipe Tape
Wanna know how I got these scars?
Here is our plug and our tape. If you have ever used white teflon tape for water lines, this stuff is at least five times thicker. The instructions for your tape will tell you to wrap the tape in a clockwise fashion (looking from the inserted end) either two or three times. I lost the instructions for mine, so I did three.
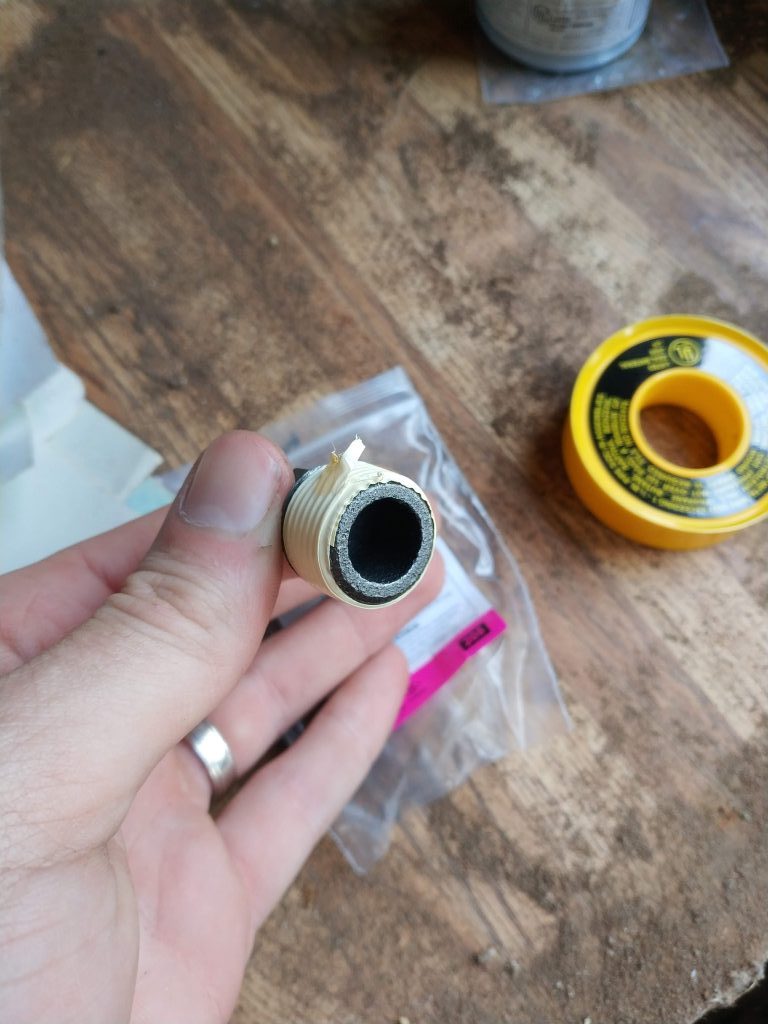
Put me in, coach!
The direction of the wrap is important. When inserting the plug, as you tighten, the wrap needs to stay on. If you wrap in the opposite direction, the end can catch, causing the wrap to come off or bunch up, making an insecure joint. I left the tail up on my tape so you could see how I did it. After breaking the tape (by pulling on it), smooth the end down so it lays flat.
Then, installation is the same as with pipe dope. Clean off the female threads with a wire brush, install, and tighten.
Done on a bun, son. Ugh; another galvanized pipe.
The tape stopped inserting after a certain point, and I was then threading the plug up inside the tape. That’s why you see the plug in further than the end of the tape. But, this should be fine. More than 2/3 of the tape is inside of the joint, and threading the plug in further only compressed it more, making a tighter seal.
Finishing Up
At this point, the gas can be turned back on. Turn your gas meter’s shutoff back to be parallel with the supply, then go into the basement and check for gas leaks. Removing pipes releases a lot of stale natural gas, so you might smell that instead of fresh flowing gas. The best way to be sure is to use a soapy water solution, applied to the joint or joints you just made. Mix some dish soap with water, enough soap so that you could make bubbles with it. Use a brush to spread this all over the plugs or pipes, and see if anything is bubbling up. If it is, tighten the joint a little more so gas can’t get out.
If everything is sealed up good, then you will need to relight any pilot lights you may have on your appliances. Most water heaters have a pilot light, and some industrial stoves do as well, though that is pretty rare to have in your house. You water heater should have instructions on it for relighting the pilot. Some require a lighter (a long one like those used for lighting barbecues is good), and some have an electric igniter you press to create a spark.
In general terms, turn the water supply gas regulator to OFF for a few minutes, then turn it to PILOT. Ignite the pilot light however your heater recommends, either with the button or with a separate lighter. Once the pilot is lit for a minute or two, and the sensor is warm enough to know know that, you can turn the gas control knob to your original water temperature.
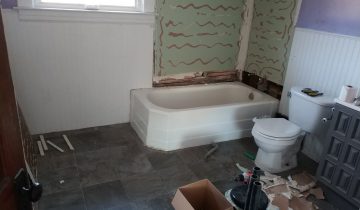
So there we have it! I have some things to take to the scrap recycling center, and our gas piping is focused down only to the places we will be using it. And, we have one less obstruction in the kitchen to planning our new layout!