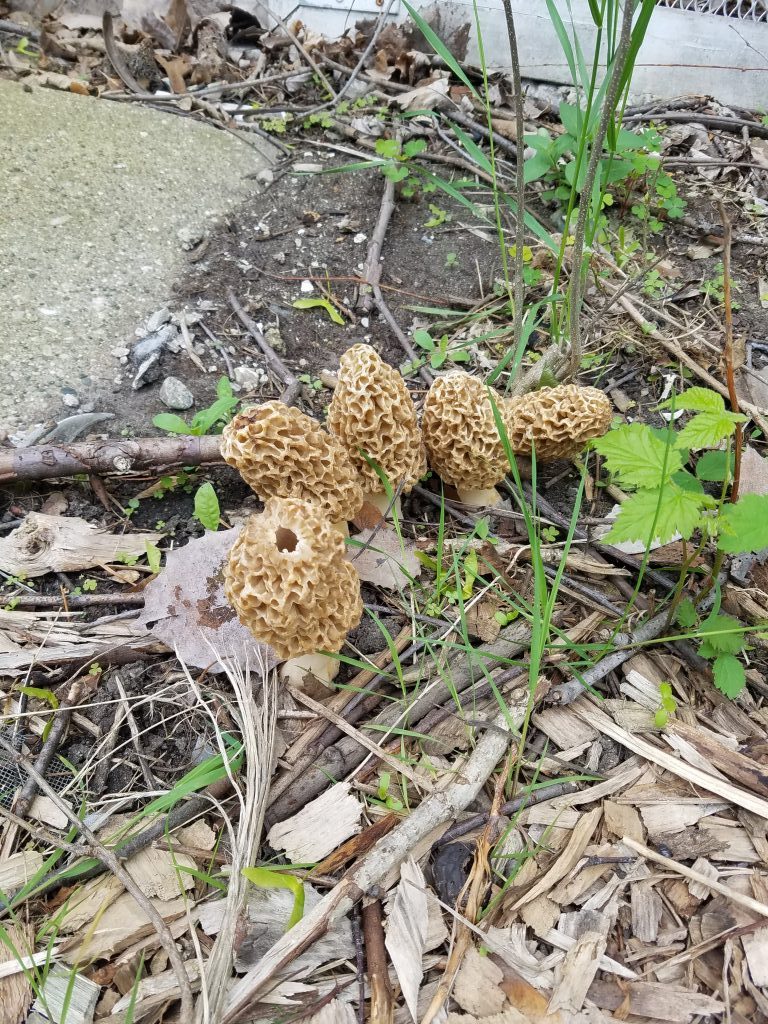
While it is (still) too late to help the apple tree this year (It should be fine! No worries!), the hoard proves to be a bountiful harvest nonetheless. Staring out of our kitchen window one day, we see a cluster of mushrooms. No big deal, there’s mushrooms all through the yard every year. But these mushrooms don’t look normal…
They didn’t leave mush room between themselves
These appear, for all intents and purposes, to be morel mushrooms. You know, the ones that go for $60+ a pound this time of year?
Identifying Morels
IMPORTANT NOTE: Do not perform any mushroom foraging based solely on the information on this page! I’m not an expert mushroom hunter, and these rules are not exhaustive. Bring a pro with you or get advice from an experienced forager before you touch or eat anything you find!
Having never foraged a mushroom before, though, it would be prudent to confirm that these are not going to kill us. A bit of research shows that there are in fact false morels that can be found in similar habitats. And, there are three important distinctions to true morels:
- Morels are completely hollow, from stem to tip. False morels will contain pith or other stringy matter filling it out.
- The stems of morels are connected to the base of the cap. False morels will have the stem connected all the way up inside to the top of the cap, making an overhanging shelf.
- Morels look shrunken, with no regular waves in the cap surface. They have peaks and pits instead, a sort of ‘honeycomb’ texture. False morels look more wrinkled, like dried up brains, with distinct wavy lines on the outside.
For reference, here is a picture of a false morel:
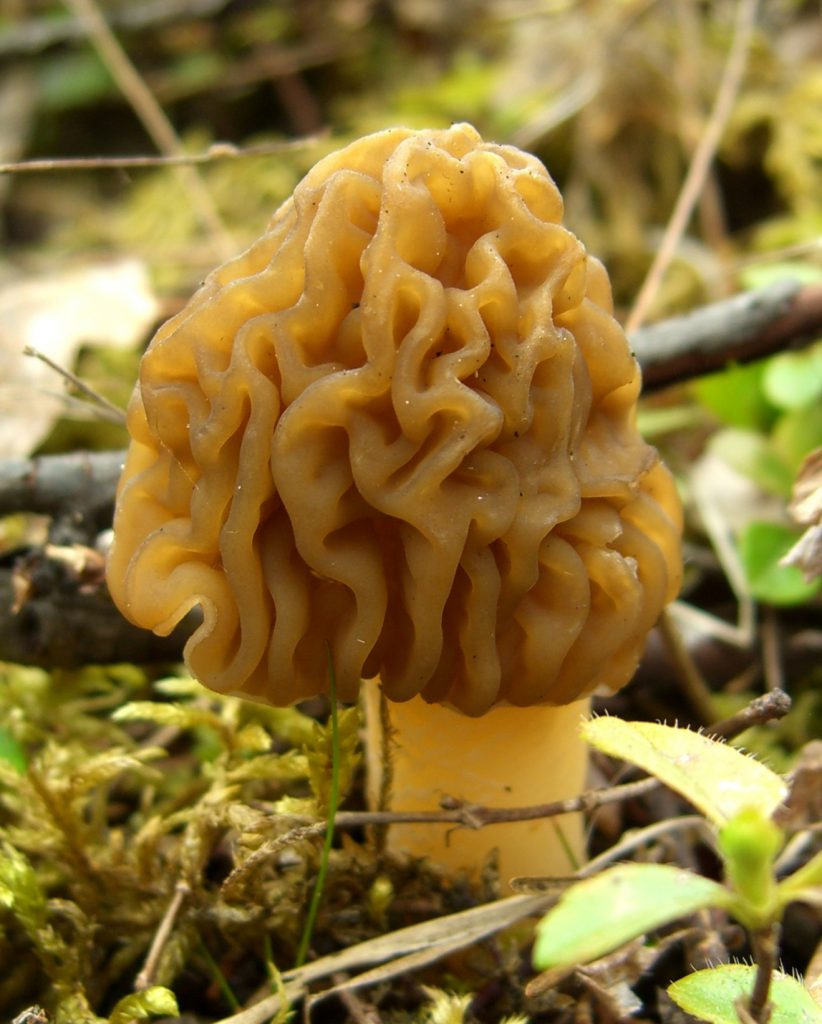
You won’t have a fun time with this fungi
Where do you find them?
Generally speaking, morels grow in the forest. Well, the edge of the forest. Not very specific, I know. Morels are notably one of the hardest mushrooms to cultivate, since they grow spore-ratically (sorry) and it would be unusual to find them in the same spot year after year. This is why they are particularly expensive; they must still be foraged for and collected manually, and supply is not consistent.
However, they have an affinity to elm, ash, and apple trees, so if you have permission, try checking out an apple orchard, or an area where some trees were recently taken down.
In our case, we have just come into spring and had our first set of 70+ degree days, and it was particularly moist from light rain. We found these mushrooms on the north side of the house, in the shade.
Harvesting Morels
How do you get a morel out of the ground? There’s a few schools of thought, but none of them involve pulling the whole cap, root and all, straight up. This will remove the precious roots which could convince another mushroom to grow there later. Advisably, bring a small knife, and cut about half an inch up from the ground. Pinching off the cap at the same location is doable, but messier.
Another tool to bring is a mesh bag. As you prance through the forest like a pixie, spores will fall off of the caps you have already picked, making other areas prone to grow more ‘shrooms for you later. A paper bag will work in a pinch, but I’d avoid plastic. Don’t shake the bag around to try and make spores fall off. You will probably destroy some of your mushrooms from exuberance.
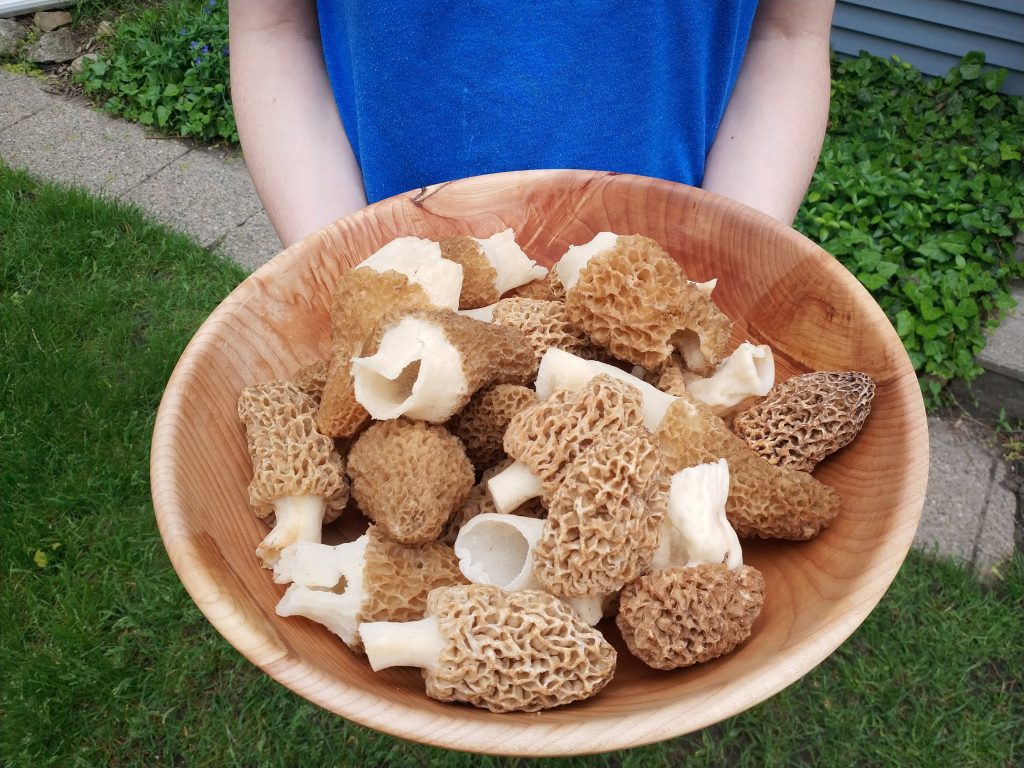
A bowl is very portable-a… portabella… I tried.
After picking our first five, we poked around the rest of the side yard, steering clear of the areas where we sprayed for poison ivy. In total, we got nearly two pounds of mushrooms! Most were the size of your hand!
Cool! Now what do we do with them?
Historically, I felt that morels were a bit unnecessary, since they are A) expensive, and B) normally just battered and fried, which you can do with literally anything and it will taste good. Battered and fried shoe insoles? Sign me up.
But, there is rarely a deviance from this style of cooking. Because honestly, its pretty good. Like, real good.
Morels MUST be cooked before eating, by the way. They purportedly contain hydrazine, a toxic chemical which is destroyed through cooking.
What did the mushroom say to the frying pan? Nothing, mushrooms can’t talk.
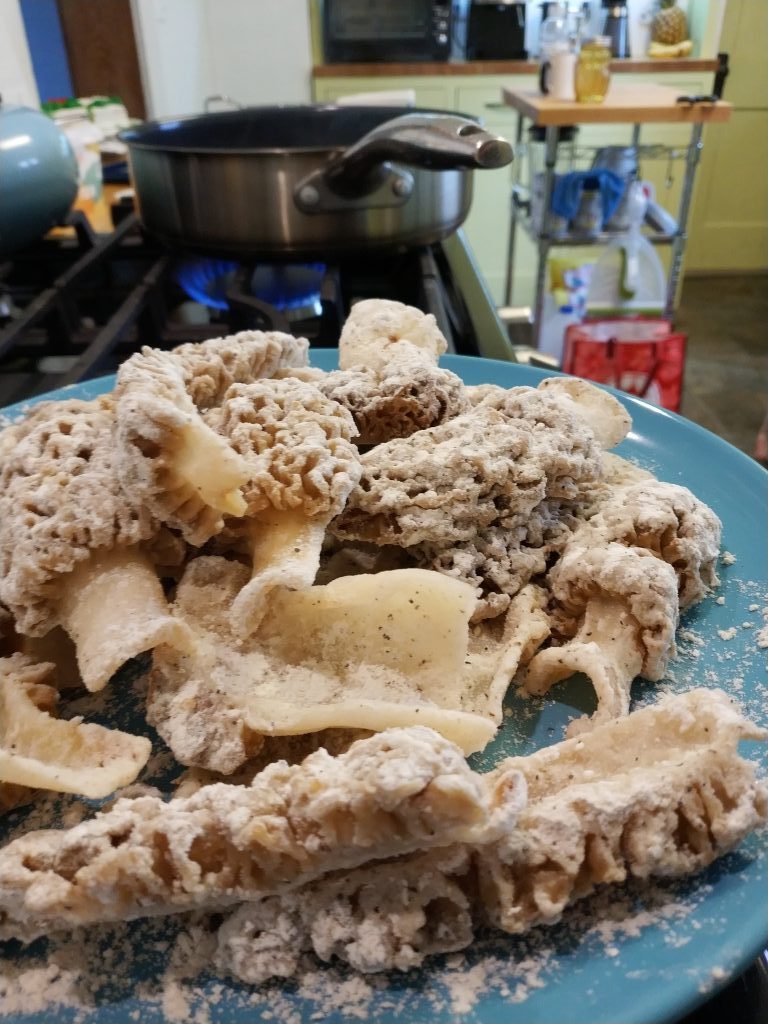
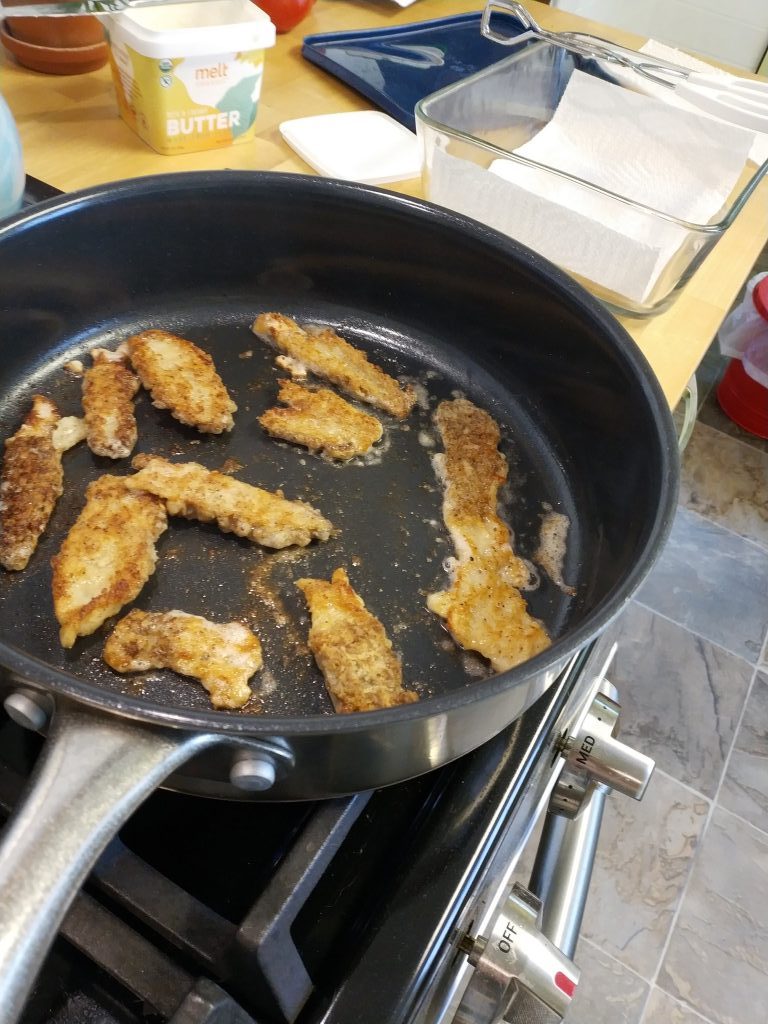
First, we soaked the mushrooms in a salt solution for about 30 minutes. This helps encourage bugs to leave, and rinses off the dirt, as well as allowing some salt to migrate into the cells of the mushroom. Then, after patting them dry, we cut them into slices, and dredged them with flour, which was mixed with some salt, pepper, and garlic powder. Finally, we added some butter to a frypan and cooked up batches of the mush strips. They needed about 7 minutes a side over medium heat. Hot enough to slowly sear, low enough not to burn.
I’d make another pun, but I’m feeling s(p)ore.
The result? Delicious. Honestly, I did not think that such a pricey treat would be that much better than any other fried mushroom. But, the thinness of the strips (due to the mush being hollow), the brine soak, and the fried exterior texture all make a super savory appetizer for charcuterie hour.
Nice find! They pop up here and there in the mulched areas of the garden too.